You’ve probably been there: a splash of red wine on a white shirt, a grease spot on your favorite blouse, a mystery mark on delicate silk. In a panic, you reach for the first advice you find online, only to find the stain now set—or worse, the fabric damaged. Most clothing stain removal guides fail because they treat all fabrics the same, offering a one-size-fits-all solution that ruins delicate materials. The truth is, effective stain removal isn’t about memorizing a hundred different hacks; it’s a systematic two-part process. First, you build a core toolkit of safe, versatile agents. Then, and only then, do you apply those tools in a precise sequence dictated by your garment’s fabric. This complete fabric-by-fabric hub flips the script, giving you a confident, damage-free strategy for everything from sturdy denim to fragile cashmere.
A complete clothing stain removal guide is less about memorizing 100 stains and more about mastering a few key tools and knowing which fabric-safe routine to follow. Start by identifying the fabric, then choose your treatment agents accordingly. Your core philosophy should be a two-part system: know your tools (like blotting, solvents, and enzymes) and then apply the right sequence for the specific material, whether it’s cotton, silk, or a synthetic blend.
Here’s how to approach clothing stains systematically: First, assemble your core toolkit—blotting materials, water, mild detergent, solvents like rubbing alcohol, and enzymatic cleaners. Then, apply these tools in a sequence tailored to your garment’s fabric, from sturdy cotton to delicate silk. Always test in an inconspicuous area first. This clothing stain removal guide provides the decision matrix for fabric-safe treatment.
Why Most Stain Removal Advice Ruins Clothes
The biggest mistake in any clothing stain removal guide is treating every fabric the same. Pouring club soda on a silk blouse because it worked on a cotton napkin is a classic recipe for disaster. The core problem is a fundamental mismatch: the chemical and mechanical tolerance of a delicate fabric versus a sturdy one.
Think of it like using tools. You wouldn’t use a sledgehammer to fix a watch. Similarly, the aggressive scrubbing or hot water that saves a cotton t-shirt can permanently damage the protein fibers in silk or wool, causing shrinkage, color loss, or a change in texture. Effective fabric stain removal tips start with understanding the material’s composition—natural fibers like cotton and linen are generally more resilient to heat and certain chemicals, while delicate naturals (silk, wool) and many synthetics require a much gentler touch. Your first clue is always the garment’s care label; it’s the manufacturer’s manual for that specific fabric blend.
Your Stain Removal Toolkit: The 5 Essential Agents
Instead of memorizing remedies for dozens of stains, master these five core “tools.” Every stain removal method for different materials is just a strategic combination of these agents.
1. Mechanical Action (Blotting, Scraping): This is physical removal. Use a clean, white cloth or dull knife to lift solids or absorb liquids. The golden rule: blot, never rub. Rubbing grinds the stain deeper into the fibers.
2. Water (The Universal Solvent): Water is your first line of defense for many stains, but temperature matters. Cold water is safe for most fabrics and helps prevent setting protein-based stains (blood, egg). Hot water can set protein and tannin stains (coffee, wine) permanently, so use it only after the stain type is confirmed and the fabric allows it.
3. Surfactants (Detergent): These are soaps that break the surface tension of water, helping it surround and lift away oily and particulate stains. A mild, clear liquid dish soap or laundry detergent is a versatile starting point.
4. Solvents (For Oil-Based Stains): Grease, oil, and some cosmetics need a solvent to dissolve them. Isopropyl (rubbing) alcohol, dry-cleaning fluid, or even glycerin can break down these stains without water. Always test on a hidden seam first, as some solvents can affect dyes.
5. Enzymes (For Protein-Based Stains): Biological stains like grass, blood, or food contain proteins. Enzymatic cleaners contain proteins that “digest” these stains. Crucial note: avoid enzymes on silk and wool, as they can damage the protein fibers of the fabric itself.
Quick Reference: Which Tool for Which Stain?
- Grease/Oil: Start with a solvent (rubbing alcohol).
- Protein (Blood, Dairy): Use cold water first, then an enzymatic cleaner (avoid on silk/wool).
- Tannin (Wine, Coffee, Tea): Use a detergent solution; sometimes a diluted white vinegar rinse helps after.
- General Dirt/Mud: Let dry, scrape off, then use a detergent solution.

The Universal Pre-Treatment Protocol (Before You Wash)
Before you even think about your washing machine, follow these steps. This protocol is your safety net, applicable to almost any fresh stain and fabric.
Step 1: Act Immediately & Blot
Time is your biggest enemy. Quickly blot up any excess liquid or solid with a clean, absorbent cloth or paper towel. Work from the outside of the stain inward to prevent spreading.
Step 2: Identify the Stain and Fabric
Ask: What is the stain? (Oily, protein-based, sugary?). What is the fabric? (Check the care label). This two-second diagnosis dictates your next move.
Step 3: Check the Care Label
This is non-negotiable. It will warn you about heat limitations, dry-clean only instructions, or other fabric-specific restrictions.
Step 4: Perform a Spot Test
Apply a tiny amount of your chosen treatment agent (detergent, solvent, etc.) to an inconspicuous area like an inner seam. Wait a few minutes, then blot dry to check for color bleeding or fabric damage.
Step 5: Apply Treatment from the Back
Place a clean cloth under the stain. Applying your treatment (detergent solution, solvent) from the back of the fabric pushes the stain out onto the cloth, rather than deeper through the fibers.
Step 6: Gently Work and Rinse
Using a dabbed or blotting motion, gently work the agent into the stain. Then, rinse thoroughly with the appropriate water temperature (when in doubt, use cold) from the back side until the water runs clear.
Only after completing these steps should you launder the garment as usual—but air dry it until you are certain the stain is gone. Putting it in the dryer sets any residual stain permanently.
Stain Removal by Fabric: Your Decision Matrix
Now, apply your toolkit with precision. This is the heart of stain removal by clothing material. Your approach hinges on the fabric family’s tolerance level. The logic flows like this: sturdy natural fibers can handle more aggressive action, delicate natural fibers need cold and gentle care, and synthetics are in-between but highly heat-sensitive.
Use the table below as your quick-reference decision matrix before diving into the specific routines.
| Fabric Family | Common Examples | Heat Tolerance | Chemical Tolerance | Mechanical Action |
|---|---|---|---|---|
| Sturdy Naturals | Cotton, Linen, Denim | High (Hot water safe) | High (Can handle oxygen bleach, stronger detergents) | Gentle scrubbing is usually safe |
| Delicate Naturals | Silk, Wool, Cashmere | Very Low (Cold water only, air dry) | Low (No bleach, no enzymes, pH-neutral cleaners only) | Blot only; rubbing causes felting |
| Synthetics & Blends | Polyester, Nylon, Rayon, Spandex | Low-Medium (Cool water, low-heat dry) | Medium (Solvents often okay, test for dye fastness) | Blotting; gentle dabbing |
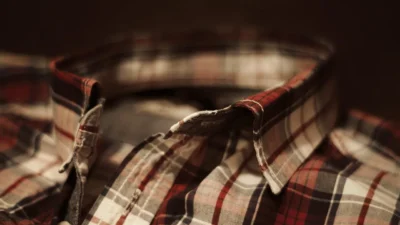
Routine for Sturdy Natural Fabrics: Cotton & Linen
For cotton t-shirts, linen tablecloths, denim jeans, and bed sheets, you can be more assertive. These plant-based fibers are durable and respond well to robust treatment.
Optimal Water Temperature & Detergents
Hot water (up to 60°C/140°F) is generally safe and effective for breaking down oils and greases on these fabrics. Use a standard laundry detergent. For stubborn stains or whitening, oxygen-based bleach (like sodium percarbonate) is a safe alternative to chlorine bleach for most colored cottons, but always check the care label first.
The Step-by-Step Routine
Follow the universal pre-treatment protocol. For tough stains, after blotting, you can apply a paste of detergent and water directly to the stain, gently rubbing it in with your fingers or a soft brush. Let it sit for 15-30 minutes before washing. You can safely machine wash on the appropriate cycle and even tumble dry on low if the care label permits. Just ensure the stain is completely gone before using heat from the dryer.
Routine for Delicate Natural Fabrics: Silk, Wool & Cashmere
This category demands kid gloves. Silk, wool, and cashmere are protein-based fibers, making them sensitive to heat, alkalinity, and agitation. The goal is to lift the stain without damaging the delicate fiber structure.
The Golden Rules: Cold, Mild, and Gentle
Use only cold water. Heat can cause silk to water-spot and wool to shrink (felt). Choose a mild, pH-neutral detergent designed for delicates or wool. Never use enzymatic cleaners, as they attack the protein in the fabric just like they attack the stain. Blotting is your only mechanical action; rubbing wool, especially, causes irreversible felting.
For sweat or deodorant stains on silk, a diluted solution of white vinegar and cold water (1 part vinegar to 3 parts water) can help neutralize salts and acids. Dab it on, let it sit for a few minutes, then rinse thoroughly with cold water. Always, always air dry these garments flat and away from direct heat or sunlight.
Imagine you’ve splashed a little red wine on a silk blouse at a dinner party. Panic sets in, but the right move is calm: quickly blot with a cool, wet cloth, then dab (don’t pour) a little cold water through the back of the stain. Later, at home, you’d spot-treat with a drop of wool wash, rinse meticulously with cold water, and lay it flat to dry. The wrong move? Rubbing it with a napkin or applying salt, which can abrade the delicate fibers.
Routine for Synthetic Fabrics: Polyester, Nylon, Rayon
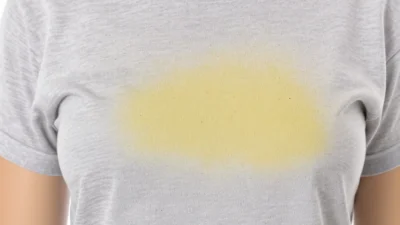
Synthetic fabrics like polyester and nylon are often stain-resistant, but they have a critical weakness: heat sensitivity. Oil-based stains are also common, as these fibers can hold onto grease.
Managing Heat and Oil
Always start with cool or lukewarm water. Applying hot water or putting a garment with an untreated stain into a hot dryer can permanently set the stain into the synthetic fibers. For cooking oil or makeup stains, a solvent like isopropyl alcohol is often very effective. Apply a small amount to a cloth and dab at the stain from the back.
The Step-by-Step Routine
After blotting, check colorfastness with your chosen solvent or detergent. Apply a small amount of liquid detergent directly to the stain, gently working it in with your fingers. Let it sit for 5-10 minutes. Wash the garment on a cool, gentle cycle. It is crucial to air dry the item until you verify the stain is completely gone. Only then, if the care label allows, use a low-heat dryer cycle.
The 5 Most Common Stain Removal Mistakes (And How to Avoid Them)
Even with the best intentions, it’s easy to make errors that turn a small spill into a permanent flaw. Here are the top pitfalls to avoid.
1. Rubbing Instead of Blotting
The Mistake: Vigorously rubbing a stain with a cloth or paper towel.
Why It’s Bad: This grinds the stain particles deeper into the fabric matrix, making it harder to remove and potentially damaging fibers.
The Fix: Always use a dabbing or blotting motion, pressing straight down and lifting straight up.
2. Using Hot Water on an Unknown Stain
The Mistake: Running a fresh stain under hot tap water immediately.
Why It’s Bad: Hot water can coagulate proteins (e.g., egg, blood) and set tannins (e.g., coffee, wine), bonding them to the fibers.
The Fix: When in doubt, use cold water. It’s safe for most fabrics and stain types initially.
3. Skipping the Fabric Test
The Mistake: Applying a stain remover or solvent directly to the visible stain without testing.
Why It’s Bad: You risk bleaching the color, damaging the fabric, or causing a discoloration that’s worse than the original stain.
The Fix: Take 30 seconds to test on an inside seam or hem. Every time.
4. Putting a Stained Garment in the Dryer
The Mistake: Machine drying a garment when a stain is still faintly visible.
Why It’s Bad: The heat of the dryer acts like an iron, permanently setting any remaining stain residue. This is often the point of no return.
The Fix: Air dry the item completely. Only use the dryer after you are 100% certain the stain is gone.
5. Mixing Cleaning Chemicals
The Mistake: Combining different stain removal agents, like bleach and ammonia.
Why It’s Bad: This can create toxic fumes (like chloramine gas) and can also damage fabrics.
The Fix: Use one treatment agent at a time and rinse thoroughly before trying another.
When to Stop: Signs You Need Professional Help
No guide can solve every problem. Knowing when to call a professional dry cleaner is a sign of smart fabric care, not defeat. Seek expert help in these scenarios:
For stubborn, old stains that have survived multiple DIY attempts, a pro has stronger solvents and techniques not available for home use. If the stain’s origin is a complete mystery, a professional can often identify and target it. With delicate heirloom items, expensive suits, or wedding gowns, the risk of DIY damage outweighs the cost of professional cleaning. Special materials like leather, suede, or beaded garments almost always require specialized care. Finally, if your own treatment attempt has visibly damaged the fabric or set the stain, a professional cleaner might still be able to mitigate the damage, but further DIY efforts will likely make it worse.
Your New Mindset for Stain-Free Clothes
Effective clothing care isn’t about magic potions; it’s about a systematic, toolkit-then-routine mindset. You now understand the core agents at your disposal and, more importantly, how to match them to the fabric in front of you. This knowledge turns a moment of panic into a manageable process.
Your next step is simple: assemble your basic toolkit. Get a mild liquid detergent, a bottle of white vinegar, some isopropyl alcohol, and maybe an enzymatic cleaner for cottons. Bookmark this guide. The next time a stain strikes, take a breath, identify the fabric, and walk through the steps with confidence. You’ve got this.
This comprehensive stain removal guide breaks down a foolproof system:
- Master Your Toolkit: The five essential agents—mechanical action, water, detergent, solvents, and enzymes—are the building blocks for all stain removal.
- Follow the Universal Protocol: Always blot first, identify the stain and fabric, test your treatment, apply from the back, and rinse thoroughly before washing.
- Choose a Fabric-Specific Routine: Apply your tools based on the fabric’s tolerance: sturdy for cotton/linen, gentle and cold for silk/wool, and cool with solvent care for synthetics.
- Avoid Common Pitfalls: Never rub stains, beware of hot water on proteins, always test, and never machine dry until the stain is completely gone.
This methodical approach empowers you to treat stains effectively while preserving your clothes.
Q: Can I use the same stain remover on all fabrics?
A: No. Using a one-size-fits-all product is a common error. Always check the product label for fabric suitability. For example, enzymatic stain removers are great for cotton but can damage silk and wool. Similarly, powerful solvents safe for polyester might harm delicate acetate or rayon. The fabric dictates the chemistry.
Q: Is it safe to use hydrogen peroxide on colored clothes?
A: It can be risky. Hydrogen peroxide is a mild bleach. While a 3% solution is often recommended for whitening and disinfecting, it can still lighten or bleach some fabric dyes. Always perform a spot test on an inconspicuous area first, and never use it on dark or vibrant colors without testing.
Q: Why does a stain sometimes look worse after I treat it?
A: This “ring” is often a wicking effect. When you treat a stain, you can push it outward, leaving a visible perimeter as it dries. To prevent this, always treat from the edges inward and rinse thoroughly. A ring can also mean the treatment wasn’t fully rinsed out, so re-rinse with clean water