You wipe down your shower wall after a steamy session, expecting a streak-free shine, but instead, you’re left staring at a stubborn, greasy film that seems to repel your cloth. That moment of frustration is a universal sign: you’re battling soap scum. This sticky residue isn’t a sign of poor cleaning habits; it’s a simple chemistry problem where soap meets the minerals in your water and the oils from your skin. The good news is that learning how to remove soap scum from bathroom tile and fixtures effectively is less about elbow grease and more about using the right strategy for your specific surfaces. This guide cuts through the guesswork with a quick diagnosis to confirm what you’re dealing with, followed by material-safe cleaning steps that work without damaging your tile, grout, or fixtures.
Yes, you can safely remove soap scum. The core principle is to first identify your tile and fixture materials, then use a targeted cleaner. For most surfaces, a paste of baking soda and dish soap or a diluted vinegar solution, applied with a non-scratch scrubber, will break down the residue without damage. Always test your chosen method in an inconspicuous area first to ensure it’s safe for your specific bathroom surfaces.
What You’re Really Dealing With: The Science of Soap Scum
That stubborn film isn’t just dirt. Soap scum is a chemical reaction you can clean up once you understand it. When soap (which is designed to bind to oils) mixes with the minerals in hard water (like calcium and magnesium), they form a sticky, insoluble compound. Add in body oils, lotions, and dead skin cells, and you get a tenacious, greasy-chalky residue that plain water can’t dissolve.
This explains why your usual wipe-down fails. The composition also varies. If your water is very hard, your scum will be more “chalky” and mineral-heavy. If you use more oily products, it will be more “greasy.” Knowing this helps you choose the right attack plan: acidic cleaners are great for breaking down mineral deposits, while alkaline cleaners excel at cutting through grease. For a deeper dive into hard water chemistry, resources like the U.S. Environmental Protection Agency’s water quality information can be helpful.
Quick Diagnosis: Is It Soap Scum or Something Else?
Before you grab a cleaner, take 30 seconds to confirm what you’re facing. Using the wrong treatment for mold or hard water stains can be ineffective or even damaging.

The Visual and Touch Test
Soap Scum: Appears as a cloudy, streaky, or dull film that’s often slightly slippery or tacky to the touch. It’s most prominent on shower walls, doors, and around drains—anywhere soapy water regularly dries. A quick “scratch test” with a fingernail may reveal a waxy or powdery residue.
Mold/Mildew: Looks fuzzy, speckled, or has distinct black, pink, or green discoloration. It often grows in grout lines, silicone caulk, and corners where moisture lingers. It won’t feel filmy; it may feel slimy.
Hard Water Stains (Limescale): These are white, crusty, crystalline deposits, often forming rings around faucets or showerheads. They feel rough and mineral-like, not greasy.
This quick diagnosis is educational; for persistent mold issues or to confirm your water hardness, consulting a professional or using a test kit is a good next step.
Your Safe Cleaning Arsenal (By Surface Type)
The golden rule: know your surface first. A perfect shower soap scum remover for tile can ruin a natural stone shower. Here’s how to match your method to your materials for effective tile fixture residue cleaning.
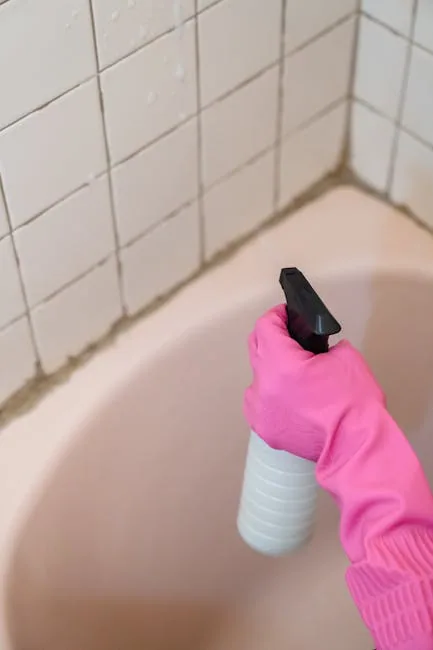
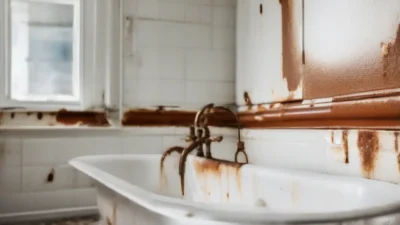
Photo by Liliana Drew on Pexels
Ceramic & Porcelain Tile (Most Common)
These are durable and non-porous, giving you flexible options.
- DIY Go-To: A paste of baking soda and a squirt of blue dish soap (the degreasing kind). It’s mildly abrasive and alkaline, perfect for cutting through grease-heavy scum.
- Alternative: Equal parts white vinegar and water in a spray bottle. The mild acid tackles mineral deposits. Let it dwell for 5-10 minutes.
- Commercial Pick: Look for a dedicated bathroom cleaner labeled for soap scum. Many are acidic (containing citric or phosphoric acid) and work well.
Natural Stone (Marble, Travertine, Limestone)
WARNING: Stone is porous and sensitive to acid. Never use vinegar, lemon juice, or acidic commercial cleaners—they will etch and dull the surface permanently.
- Only Safe DIY: A few drops of pH-neutral dish soap in warm water.
- Commercial Must: Use only cleaners specifically formulated for natural stone.
Glass Shower Doors & Enclosures
To avoid scratches, skip harsh abrasives.
- DIY Go-To: The vinegar/water spray works wonders here. For tougher buildup, add a bit of dish soap to the mix.
- Tool Tip: A squeegee after every shower is the best prevention for soap scum buildup on shower walls and glass.
Metal (Chrome, Stainless) & Plastic Fixtures
For faucets, showerheads, and soap dishes, gentle is key.
- Universal Method: Your dish soap and water solution or the baking soda paste applied with a soft cloth. For faucet buildup, you can wrap a vinegar-soaked paper towel around it for 15 minutes.
- Avoid: Scouring powders on chrome, as they can scratch.
The Step-by-Step Scrub-Down (Without the Damage)
Once you’ve diagnosed the scum and chosen your surface-safe cleaner, this universal procedure ensures you clean soap scum off shower tile effectively without causing harm.
DO ventilate the room by turning on the fan or opening a window. DON’T mix chemicals (like bleach and ammonia) ever.
1. Pre-Rinse: Wet the surface with warm water. This loosens the top layer and prepares the scum to accept the cleaner.
2. Apply & Dwell: Apply your chosen cleaner liberally. This is the most overlooked step! Let it sit for 10-15 minutes. This dwell time allows the chemistry to work, breaking bonds so you scrub less.
3. Gentle Agitation: Use the right tool. A non-scratch nylon brush or a melamine foam pad (like a Magic Eraser) is ideal for most tiles and grout. For glass, use a soft scrub brush or cloth. The goal is to lift the residue, not sand the surface.
4. Thorough Rinse: Rinse everything thoroughly with clean water. Leftover cleaner can leave its own filmy residue.
5. Dry & Shine: Wipe surfaces dry with a microfiber cloth to prevent immediate re-spotting and water spots. For fixtures, a dry cloth will bring back the shine.
Common Mistakes That Make Soap Scum Worse
Frustration often leads to shortcuts that backfire. Avoid these pitfalls to save time and protect your bathroom.
- Using Acid on Stone: As noted, this is the fastest way to cause permanent, expensive damage to natural stone surfaces.
- Scrubbing Too Hard with Abrasives: Steel wool or harsh scouring pads on acrylic tubs, enamel, or chrome will create micro-scratches. These tiny grooves then trap dirt and scum even faster, making future bathroom tile soap scum removal harder.
- Skipping the Dwell Time: Spraying and immediately wiping is just spreading the scum around. Let the cleaner do the heavy lifting.
- Not Rinsing Completely: Soap-based or creamy cleaners left on the surface will dry into a new, thin layer of film, undoing your work.
- Using Bleach on Grout (For Scum): Bleach kills mold but does not dissolve soap scum. It can also weaken grout over time and is harsh to breathe in a confined space.
Reclaim Your Sparkle, the Right Way
Winning the battle against soap scum isn’t about muscle; it’s about method. By correctly diagnosing that greasy film and then choosing a cleaner that matches both the scum’s composition and your surface material, you turn a frustrating chore into a quick win. The right soap scum cleaner for tile is the one that works without leaving damage behind.
Your decisive next step is simple: identify your primary surface, gather your safe supplies (baking soda, dish soap, vinegar, or a trusted commercial product), and follow the gentle scrub-down steps. In under 30 minutes, you can transform a dingy shower into a sparkling clean space. Go tackle it.