That sinking feeling is universal: you turn into your driveway and see the dark, ominous splatter of engine oil on the pristine concrete. Or, you reach for your morning coffee only to watch in slow motion as it cascades over the center console and into the passenger seat. In that moment, a stain transforms from a simple mess into a source of panic, threatening your vehicle’s value or your garage’s cleanliness. This comprehensive vehicle stain removal guide is designed to turn that panic into a plan. Think of it not as a list of random automotive stain removal tips, but as your master reference for systematically tackling any spill, smear, or splatter—whether it’s on delicate leather, vulnerable paint, or rugged workshop floors. We’ll first help you build a versatile cleaning arsenal, then apply that toolkit through targeted, battle-tested protocols for interiors, exteriors, and garage surfaces.
A successful vehicle stain removal guide hinges on a simple two-step approach: first, assemble a core cleaning toolkit for interiors, exteriors, and workshop surfaces; second, follow targeted protocols based on the specific stain and material you’re dealing with. Effective cleaning always starts with identifying the stain type and the surface it’s on, then using the right tools and cleaners from your kit. The single most important rule is to always test your chosen method in an inconspicuous area first to prevent damage.
Your Core Cleaning Arsenal: The Essential Toolkit
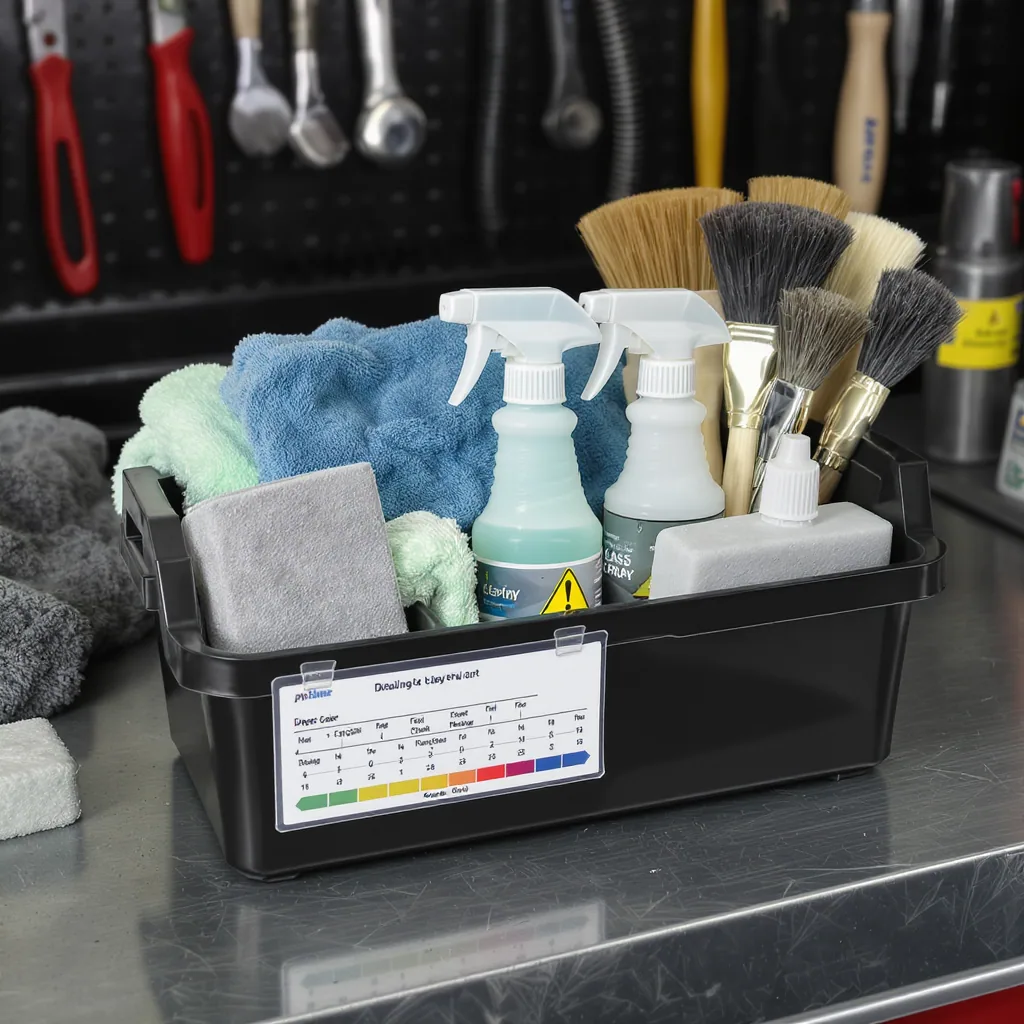
Before you face a single stain, building a versatile cleaning kit is your most strategic move. This isn’t about buying every specialty product on the shelf; it’s about assembling a core set of tools and cleaners that can be adapted for 90% of the messes you’ll encounter on your vehicle’s interior, exterior, and garage surfaces. Think of it as your first-response unit.
Absorbents & Agitators
Your first line of defense is about containment and gentle agitation. Stock white, absorbent microfiber towels (color-coded for different tasks to avoid cross-contamination), a pack of disposable shop towels for greasy messes, and a soft-bristled detailing brush for fabrics and crevices. For fresh liquid spills, a bag of oil-absorbent powder or even plain cat litter is a garage-floor lifesaver.
Cleaners: Understanding pH is Key
Not all cleaners are equal, and their pH level dictates their purpose. Alkaline cleaners (pH >7) are great for breaking down organic matter like grease, oil, and food spills. Acidic cleaners (pH <7) are effective against mineral deposits, rust, and water spots. Neutral pH cleaners (around 7) are safe for most surfaces and are ideal for maintenance. Your kit should have at least one of each: an all-purpose degreaser (alkaline), a wheel cleaner or water spot remover (acidic), and a pH-neutral interior or quick detailer.
Protectants & Specialized Tools
Cleaning is only half the battle. A fabric protectant spray for upholstery, a paint sealant or ceramic spray coating for your car’s exterior, and a concrete sealer for your garage floor make future cleanup dramatically easier. For automotive stain removal tips on exteriors, include a detailing clay bar kit to safely pull embedded contaminants from paint.
- Core Toolkit Checklist: Microfiber towels (multiple), soft detailing brushes, all-purpose degreaser, acidic wheel cleaner, pH-neutral interior cleaner, glass cleaner, isopropyl alcohol (for adhesives), fabric/upholstery cleaner, protectant sprays, clay bar kit, nitrile gloves, and safety glasses.
The Universal Stain Removal Protocol: A 10-Step Framework
With your toolkit ready, this 10-step framework is your master routine. It applies whether you’re dealing with coffee on a seat or oil on concrete, turning panic into a calm, systematic process. This is the foundational mindset for all effective car and garage stain cleaning.

- Safety First: Ventilate the area. Put on nitrile gloves and safety glasses, especially when using chemicals.
- Identify the Stain & Surface: What is it? (Organic, oil-based, dye, etc.) What is it on? (Fabric, painted metal, porous concrete?). This dictates your cleaner choice.
- Contain & Remove Excess: For liquids, blot—never rub—with an absorbent towel. For solids, gently scrape with a plastic card.
- Test Your Cleaner: In an inconspicuous area, apply your chosen cleaner to a microfiber towel and dab. Check for color transfer or damage after a minute.
- Apply Methodically: Work from the edges of the stain inward to prevent spreading. Use a dabbing or gentle circular motion.
- Let the Cleaner Dwell: Allow it to break down the stain for the time recommended on the label, but don’t let it dry.
- Rinse or Extract Residue: For washable surfaces, rinse with clean water. For upholstery, use a damp microfiber towel to blot out cleaner and stain residue. A wet/dry vac is ideal for carpets.
- Dry Thoroughly: Use a dry microfiber towel to absorb moisture. Allow the area to air dry completely to prevent mildew.
- Inspect and Repeat if Necessary: If a stain shadow remains, repeat the process. Sometimes multiple gentle applications beat one aggressive one.
- Apply a Protectant: Once the surface is clean and dry, apply an appropriate sealant or protectant to guard against future stains.
Pro-Tip: The “Blot, Don’t Rub” Mantra
- Rubbing grinds stain particles deeper into fibers or scratches delicate surfaces.
- Blotting uses absorbent pressure to lift the stain upward and out.
- For glued-on substances like sap, letting an appropriate solvent dwell makes scraping unnecessary.
- Patience is a cleaner. Let the chemical do the work so you don’t have to use force.
Vehicle Interior Stain Removal: Upholstery, Carpets, and Plastics
Applying the universal protocol here requires extra finesse due to sensitive materials. The goal is to remove the stain without leaving a “clean spot” that’s more noticeable than the original mess.
Fabric Upholstery & Carpets
For common spills like coffee, soda, or food, a dedicated fabric/upholstery cleaner and a soft brush are your best friends. After applying cleaner and agitating, extraction is critical. Use a wet/dry vacuum or layer dry towels and press firmly to pull moisture and residue out. For pet accidents, use an enzymatic cleaner designed to break down organic odors at the source, not just mask them.
Here’s a common scene: you spill a milkshake on the passenger seat. The instinct is to wipe it quickly, smearing the sugary fat deeper into the fabric. Instead, you scrape up the bulk with a card, blot the area with a dry towel, then apply a small amount of upholstery cleaner with a damp microfiber, working in circles from the outside in. After letting it dwell, you blot aggressively with a dry towel until no more moisture transfers, then leave the windows cracked to air out. The result is no sticky residue and no obvious ring.
Leather & Vinyl
These materials are less forgiving. Avoid harsh degreasers or all-purpose cleaners. Use a pH-balanced leather or vinyl cleaner. Always apply cleaner to your microfiber towel first, not directly onto the surface, to prevent oversaturation. For ink or dye transfer, a dab of isopropyl alcohol on a towel can work, but test it in a hidden seam first.
Plastics & Dashboard
Sticky residues from tapes, stickers, or spilled drinks can be tackled with isopropyl alcohol or a dedicated adhesive remover. Apply sparingly, as some plastics can become brittle or discolored with overuse.
- Do: Blot liquids immediately. Use a wet/dry vac for deep cleaning carpets. Test any cleaner in a hidden spot.
- Don’t: Oversaturate leather or vinyl. Use abrasive scrubbers on fabric. Use glass cleaner or armor-all type products as stain removers.
Vehicle Exterior Stain Removal: Paint, Glass, Wheels, and Trim
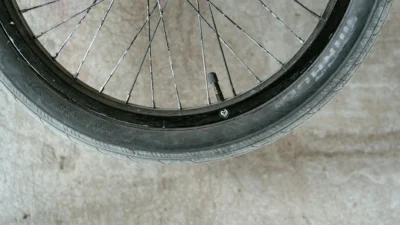
Exterior stains are a battle against time and chemistry. Bird droppings, tree sap, and bug splatter are acidic and can etch into clear coat if left. Exterior vehicle stain treatment is about safe, swift removal.
Photo by Towfiqu barbhuiya on Pexels
Painted Surfaces
For fresh biological stains, soak the area with a damp microfiber towel to soften it, then gently wipe away. Never use dry wiping. For tree sap or tar, apply a dedicated tar remover or a small amount of isopropyl alcohol to a towel and hold it on the spot to dissolve the sap, then wipe gently. For embedded contaminants (rough texture), use a detailing clay bar with ample lubricant. Always follow with a wash and wax or sealant.
Wheels & Tires
Brake dust is corrosive. Use a dedicated, pH-specific wheel cleaner (often acidic for iron particles). Spray on a cool wheel, let it dwell, and agitate with a soft wheel woolie before rinsing thoroughly. Avoid getting strong wheel cleaner on painted brake calipers or body paint.
Glass & Chrome/Plastic Trim
For water spots on glass, a white vinegar solution or a dedicated water spot remover works well. For chrome, a mild metal polish can restore shine. For plastic trim stained by tire dressing overspray, a dedicated trim cleaner or a mild all-purpose cleaner can help.
Garage & Workshop Surface Degreasing and Cleaning
This is where car and garage stain cleaning gets heavy-duty. Concrete is porous, so speed is critical for oil and fluid spills.
Fresh Oil & Fluid Spills
Immediately cover the spill with an absorbent powder or cat litter. Let it sit for several hours or overnight to draw the oil up. Sweep up the saturated material and dispose of it properly. For the remaining stain, apply a concentrated concrete degreaser, scrub with a stiff bristle brush, and rinse. A pressure washer can be highly effective here.
Set-In Stains & General Degreasing
For old, dark stains, you may need a stronger solution. A paste of trisodium phosphate (TSP) or a commercial concrete cleaner/etch can lighten them. Always follow product instructions and safety data sheets (OSHA provides guidelines for chemical safety). For epoxy-coated floors, use cleaners recommended by the coating manufacturer to avoid damaging the finish.
Workbenches & Tools
A simple all-purpose degreaser works for most bench tops. For rusty tools, a rust dissolver gel can be applied, left to dwell, and then wiped clean.
Stain-Specific Deep Dives: From Adhesives to Biologicals
Some stains require a specific approach. Here’s a quick-reference guide for stubborn offenders, referencing back to your core toolkit.
Chewing Gum or Glue
Harden the substance with an ice cube in a plastic bag. Once brittle, carefully scrape off the bulk with a plastic card. Any remaining residue can be treated with a small amount of goo gone or isopropyl alcohol.
Mildew & Mold
On hard, non-porous surfaces, a solution of diluted bleach or a dedicated mold remover can be used (ensure ventilation). For car interiors, specialized anti-mold cleaners are safer for materials and health. Address the moisture source to prevent recurrence.
Rust Stains
On concrete, a rust remover containing oxalic acid is effective. On vehicle paint or chrome, a dedicated rust remover or a mild clay bar treatment can be tried. Severe rust may require professional attention.
Battery Acid
Neutralize immediately with baking soda and water. After the fizzing stops, flush the area with copious water. Wear full protective gear. For automotive spill cleanup of this nature, safety is the absolute priority.
Common Pitfalls and How to Avoid Them
Even with the best intentions, it’s easy to make a small problem worse. Here are the most common errors in stain removal and how to sidestep them.
Rubbing Instead of Blotting: This grinds the stain deeper, especially on fabrics and carpet. Always blot to lift.
Using Abrasive Pads on Paint or Glass: Scotch-Brite pads or steel wool will leave permanent scratches. Use soft microfiber towels and detailing clay instead.
Skipping the Test Spot: Assuming a cleaner is safe can lead to discoloration or texture damage. The one minute it takes to test can save a costly repair.
Mixing Cleaning Chemicals: Combining cleaners (like bleach and ammonia) can produce toxic gases. Never mix products unless the manufacturer explicitly states it is safe.
Applying Heat to a Fresh Stain: Using a hairdryer or hot water on a protein-based stain (blood, egg, milk) can cook it into the fibers, making it permanent. Use cool water first.
Using the Wrong pH Cleaner: An acidic cleaner on an alkaline stain (or vice versa) can be ineffective or even cause a damaging reaction. Match the cleaner to the stain type.
Aftercare and Prevention: Keeping Surfaces Pristine
The most effective vehicle stain removal guide is the one you rarely need. Shifting from reaction to prevention saves time and preserves your property’s value.
Interior Protection
After a deep clean, apply a fabric protectant to upholstery and carpets. These create an invisible barrier that causes liquids to bead up, giving you time to blot them away. For leather, use a quality conditioner to keep it supple and less absorbent.
Exterior Protection
A quality wax, sealant, or ceramic coating is your paint’s best defense. These layers make it harder for contaminants like sap, bird droppings, and road tar to bond to the clear coat, allowing for easier removal during your next wash.
Garage Floor Protection
Once your concrete is clean and dry, applying a penetrating sealer or an epoxy coating will prevent oil, grease, and antifreeze from soaking in. Spills will pool on the surface, ready for easy wiping.
- Prevention Mini-Checklist: Apply fabric guard to seats and carpets every 6-12 months. Maintain a layer of wax or sealant on your paint. Use floor mats in the car and a drip tray under the engine. Seal your clean garage floor. Address spills immediately—the #1 rule.
From Panic to Protocol: Your Confidence is the Best Cleaner
Stains are inevitable, but damage and frustration are not. By equipping yourself with a thoughtful toolkit and internalizing a systematic approach, you’ve moved from reacting in dread to responding with a plan. Whether it’s a latte on the console or an oil leak on the floor, you now have a reference that turns a moment of panic into a series of simple, controlled steps.
The true goal of mastering these methods isn’t just a clean car or garage—it’s the peace of mind that comes with self-reliance. You’re not just removing a mark; you’re preserving your investment and your pride. So build your kit, bookmark this guide, and face the next spill not as a disaster, but as a minor detour you’re fully prepared to handle.
This comprehensive guide breaks down stain removal into three manageable zones: vehicle interiors, exteriors, and garage surfaces. The core philosophy is universal: first, identify the stain and surface; second, use the appropriate tools from a prepared arsenal; third, follow a methodical protocol—always starting with a test spot. Key takeaways include the critical importance of blotting (not rubbing), using pH-appropriate cleaners, and the ultimate power of prevention through sealants and protectants. With this structured approach, effective cleaning becomes a repeatable skill, not a guessing game.
Q: Can vinegar and baking soda remove all car stains?
A: No. While this combination is a useful, mild abrasive and deodorizer for some tasks, it’s not a universal solution. Vinegar (acidic) is good for mineral deposits and some odors, but it’s ineffective on oil-based stains. Baking soda can help absorb odors. For most automotive stains, dedicated cleaners matched to the stain type (enzyme, degreaser, solvent) are far more effective and safer for sensitive materials.
Q: Is it safe to use a pressure washer on my car’s interior stains?
A: Absolutely not. The high-pressure water will force moisture and contaminants deep into upholstery foam, carpet backing, and electronics, leading to permanent water damage, mold growth, and electrical failures. Interior cleaning relies on controlled application, blotting, and extraction with towels or a wet/dry vacuum.
Q: How do I remove old, set-in oil stains from a concrete garage floor?
A: For stubborn stains, use a concentrated concrete degreaser or a paste of trisodium phosphate (TSP). Apply, scrub aggressively with a stiff brush, and let it dwell. For severe cases, a pressure washer can help blast out the broken-down residue. Complete removal may not be possible, but significant lightening is. Sealing the floor afterward prevents future stains.
Q: What’s the safest