It happens in a heartbeat. You’re merging onto the highway, your passenger takes a sip, and a rogue wave of coffee leaps from the cup, landing with a sickening splat on your car seat. Your heart sinks. That moment of panic is universal, but the path to a clean seat isn’t. Rushing in with the wrong cleaner can set a stain permanently or damage your upholstery. This isn’t just another generic car seat stain removal guide; it’s a diagnostic protocol. The single most important rule for effective car interior fabric stain cleaning is this: the right method depends entirely on two factors you must identify first—your seat’s material and the type of spill you’re facing. Let’s turn that moment of panic into a calm, systematic response.
To safely remove a stain from your car seat, first identify the upholstery material and the spill type. Always blot, never scrub, and test your cleaning solution on a hidden area first to prevent damage. The safest approach is to first identify your car’s upholstery material (cloth, vinyl, leather, synthetic suede) and the nature of the stain (water-based, oil-based, protein, dye). This two-step diagnosis is the foundation of all effective vehicle upholstery stain care.
The Universal First-Aid Protocol for Any New Spill
Before you even think about what the stain is or what your seats are made of, there is a universal sequence you must follow. This is your emergency protocol, designed to prevent a minor accident from becoming a permanent eyesore. Think of it as the “blot, don’t panic” method for immediate car interior fabric stain cleaning.
The 5-Step Emergency Response
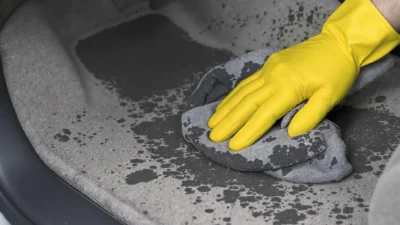
- Blot, Don’t Rub. This is the golden rule. Immediately grab a clean, dry, absorbent microfiber cloth or paper towel and press down firmly on the spill. The goal is to soak up as much liquid as possible. Rubbing grinds the substance deeper into the fibers, spreading the stain and damaging the material.
- Identify the Spill. Take a second to figure out what you’re dealing with. Is it water-based (coffee, soda, juice), oil-based (grease, makeup, butter), protein-based (blood, milk, egg), or a dye (ink, berry juice)? The category dictates your cleaning solution.
- Identify the Material. Quickly check your owner’s manual or feel the seat. Is it cloth, smooth vinyl, genuine leather, or a fuzzy synthetic suede? Your material’s tolerance for water and chemicals is your cleaning boundary.
- Gather Correct Supplies. Based on steps 2 and 3, prepare your mild cleaning solution—often just dish soap and water—and have more clean microfiber cloths ready. Never grab a random household cleaner first.
- Test in a Hidden Spot. This is your insurance policy. Apply a tiny amount of your chosen cleaner to an inconspicuous area like the backside of a seat bolster or under the seat. Wait a few minutes to check for discoloration or texture change. If it’s safe, proceed.
This protocol is the foundation of all effective vehicle upholstery stain care. Skipping steps, especially the blotting and the spot test, is how good intentions lead to bad results.
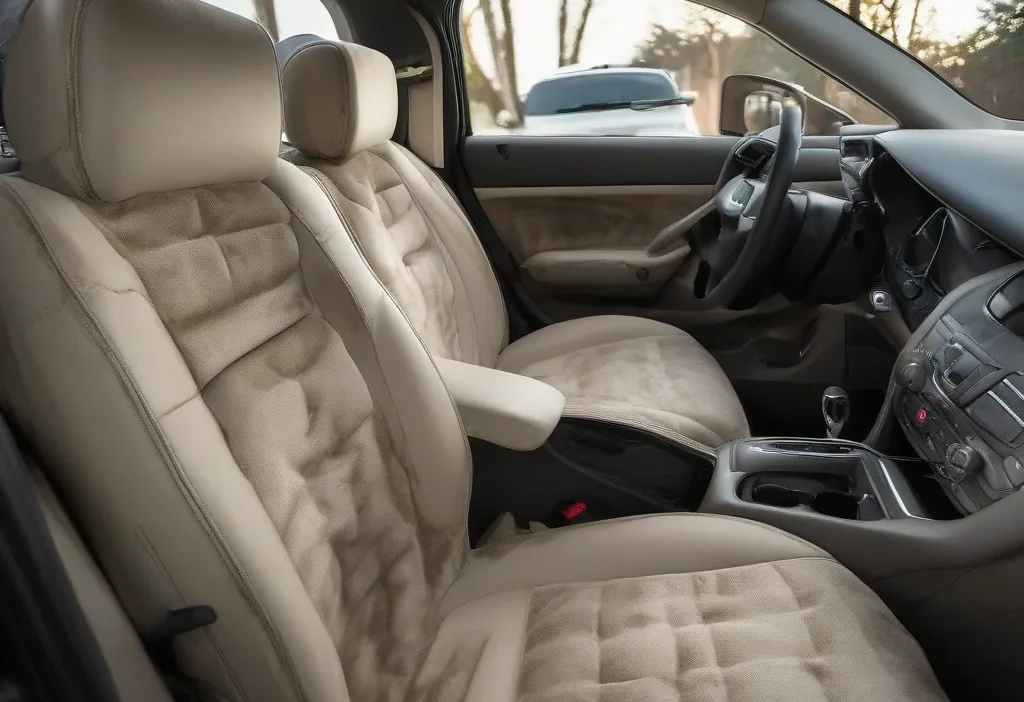
Material Decoder: Your Car’s Upholstery & How to Clean It
Your car’s interior isn‘t a monolith. Using the wrong cleaner on the wrong material is the fastest way to cause fading, cracking, or a nasty ring. Here’s how to identify the four main types and treat them with respect.

Cloth / Fabric Upholstery
How to Identify: The most common material. It’s woven, feels fibrous, and absorbs liquids quickly. It can range from rough to velvety.
Safe Cleaners: Mild dish soap (like Dawn) diluted in water is your best friend. For tougher stains, a 50/50 mix of white vinegar and water works well. Always use a light hand with moisture.
Absolute No-Nos: Avoid bleach, abrasive scrubs, and excessive soaking. Never use a colored towel that might bleed dye. Over-wetting can lead to mildew and water stains deep in the cushion.
Vinyl / Leatherette
How to Identify: A synthetic, plastic-based material. It has a smooth, uniform surface that is non-porous and easy to wipe down. Common in many modern cars.
Safe Cleaners: A general-purpose, non-abrasive interior cleaner or a mild soap and water solution works perfectly. It’s very forgiving.
Absolute No-Nos: Harsh solvents like acetone, nail polish remover, or undiluted isopropyl alcohol can break down the plasticizers, causing the vinyl to dry out, crack, or become sticky.
Genuine Leather
How to Identify: Feels soft, supple, and has a unique grain pattern (no two spots are identical). It’s often perforated for ventilation and requires specific care.
Safe Cleaners: Use only pH-balanced cleaners and conditioners made specifically for automotive leather. These clean without stripping natural oils.
Absolute No-Nos: Do not use soap, saddle soap, household cleaners, or excessive water. These will strip the protective topcoat and oils, leaving the leather dry, stiff, and prone to cracking. Never let liquids pool on the surface.
Synthetic Suede / Alcantara®
How to Identify: A fuzzy, napped material that feels like suede but is made from polyester and polyurethane. It’s great for grip but stains easily.
Safe Cleaners: Start with a dry, soft suede brush or a clean microfiber towel to lift surface dirt. For stains, use a tiny amount of mild soap solution, applied with a barely-damp cloth, and brush the nap back up when dry.
Absolute No-Nos: Avoid saturating with water or liquid cleaners, which can leave permanent water marks and mat down the fibers. Do not scrub aggressively, as this can ruin the delicate nap permanently.
Spill-Type Playbook: From Coffee to Grease to Ink
Now, match your material knowledge to the enemy. Different stains require different tactics. Here are specific recipes and methods for the most common spill categories.
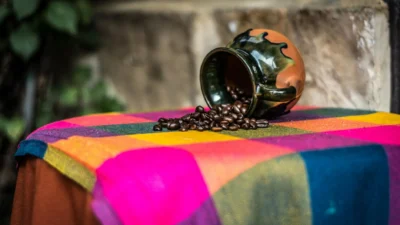
Water-Based Stains (Coffee, Soda, Juice, Wine)
These are often the easiest to tackle if you act fast. The stain is usually from sugars or tannins, not the liquid itself.
Solution: Mix 1-2 drops of clear dish soap with 1 cup of lukewarm water. Using a microfiber cloth dipped in the solution and wrung out until barely damp, gently dab the stain from the outside in. Follow with a clean, damp cloth to rinse the soap, then blot dry. For wine or juice, a light spritz of the vinegar/water mix after blotting can help neutralize the dye.
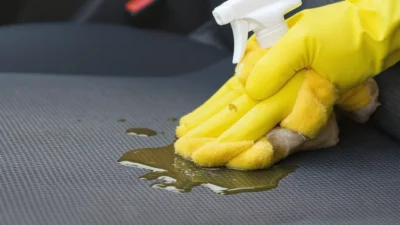
Oil & Grease-Based Stains (Food Grease, Makeup, Lotion)
These repel water, so you need a degreaser. Dish soap is a mild surfactant designed to cut through grease, making it perfect here.
Solution: Apply a tiny drop of undiluted dish soap directly onto the stain. Gently work it in with your finger or a soft brush for cloth seats. Let it sit for 5-10 minutes to break down the grease. Then, using a damp cloth, work in small circles to lift the soap and stain. Blot dry thoroughly. For vinyl or leather, use the soapy water solution instead of pure soap.
Protein & Organic Stains (Blood, Milk, Vomit, Mud)
These can set and smell if not treated properly. Enzyme-based cleaners are highly effective as they break down the organic matter.
Solution: For fresh stains, cold water and mild soap are key (hot water cooks proteins, setting the stain). For set-in or smelly stains, a commercial enzymatic cleaner (like those for pet accidents) is your best bet. Apply according to the product’s directions, allowing it to dwell for the full recommended time to let the enzymes work, then blot away.
Dye & Tannin Stains (Ink, Berry Juice, Mustard, Curry)
These are the trickiest, as the pigment can bond to the fibers. Speed is critical.
Solution: Immediately blot with a cloth dampened with rubbing alcohol (isopropyl alcohol) for cloth or vinyl seats—but always spot-test first, as alcohol can strip dyes. Dab, don’t rub. For leather, avoid alcohol; use a dedicated leather cleaner immediately. For berry stains on cloth, sometimes a paste of baking soda and water left to dry can help lift the color.
Mystery Stains (The “What Is That?” Stain)
When in doubt, start with the gentlest option and work your way up.
Solution: Use the universal dish soap and water solution. If that doesn’t work, try the vinegar and water solution. As a last resort for durable materials like cloth or vinyl, a very diluted all-purpose cleaner can be tried. The goal is to remove stains from car upholstery without adding a new problem.
The Most Common Car Seat Cleaning Mistakes (And How to Avoid Them)
Even with the best intentions, it’s easy to make a stain worse. Here are the pitfalls we see all the time, so you can steer clear.
Don’t: Scrub Vigorously | Do: Blot and Dab
Scrubbing seems logical, but it’s disastrous. It forces the stain deeper into the backing of the fabric and can fray fibers or scratch delicate surfaces. Always press and lift—blotting pulls stain up, scrubbing grinds it in.
Don’t: Use Generic Household Cleaners Blindly | Do: Use Material-Specific or Mild Solutions
Glass cleaner, bleach, ammonia-based cleaners, or all-purpose sprays can contain solvents and brighteners that permanently discolor fabrics, strip leather, and degrade vinyl. Your diluted dish soap is safer and cheaper.
Don’t: Soak the Area | Do: Use Minimal Moisture
Drenching a seat, especially fabric, can lead to water stains, mildew growth inside the cushion, and a musty smell that’s nearly impossible to eradicate. Your cloth should be damp, not wet.
Don’t: Skip the Spot Test | Do: Test Every Single Time
Assuming “this cleaner is safe” is a gamble with your interior’s appearance. 30 seconds spent testing behind a seat flap can save you hundreds in repair or reupholstery costs. It’s non-negotiable.
Don’t: Apply Heat to a Fresh Stain | Do: Let It Air Dry
Using a hairdryer or parking in the hot sun to dry a wet area can bake the stain into the material, making it permanent. Let the area dry at room temperature, and use a fan to circulate air if needed.
Advanced Tactics for Set-In and Old Stains
What if the spill happened yesterday, last week, or you just bought a used car with a history? The first-aid protocol is over, but the battle isn’t lost. You need a more strategic approach for deep-seated grime.

Photo by Liliana Drew on Pexels
Start by vacuuming the area thoroughly with a stiff brush attachment to lift any dried particulate. For fabric seats, a soft-bristled brush (like a clean toothbrush or upholstery brush) is your best tool. Apply your cleaning solution to the brush, not directly to the seat, and gently agitate the fibers in a circular motion to break up the stain. This mechanical action, combined with the cleaner, can lift what surface dabbing cannot.
For overall grubbiness, a wet/dry vacuum (like a little green machine) can be a game-changer. It injects a cleaning solution and immediately suctions it back out, preventing over-wetting. For leather and vinyl, a dedicated interior detailer brush can clean seams and perforations without scratching.
Steam cleaners can be effective on fabric for sanitizing and lifting old stains, but use extreme caution. Hold the nozzle at least 6 inches away, use minimal passes, and ensure powerful extraction to avoid soaking the padding. They are generally not recommended for leather or suede.
Finally, know when to call for backup. If a stain has survived your best efforts, or if it’s a large area of discoloration, a professional automotive detailer has industrial-grade extractors, specialized chemicals, and the expertise to handle it. It’s an investment that can restore your interior and protect your car’s resale value.
Keeping Your Car’s Interior Pristine (Before the Next Spill)
The true secret to a spotless interior isn’t just about reacting perfectly—it’s about building habits that prevent disasters. The best vehicle upholstery stain care is proactive. Consider using quality seat covers, especially if you have kids or pets. Keep a small emergency kit in your trunk: a few microfiber cloths, a travel-sized bottle of dish soap, and a spray bottle of water. The moment a spill happens, you’re ready to execute the protocol without rummaging.
Remember, your car’s interior is a high-traffic zone. Regular vacuuming and a quick wipe-down of surfaces with the appropriate cleaner every month or two will prevent dirt from becoming a ground-in stain. You now have a system: identify the material, identify the spill, and follow the mapped sequence. With this knowledge, that moment of panic transforms into a moment of confident action, keeping your car looking and feeling fresh for the long road ahead.
This guide boils down to a simple equation: Correct Method = Material + Spill Type. Here are the non-negotiable takeaways to remember:
- Blot, Never Rub: This is the first and most critical step for any fresh spill.
- Always Spot Test: No cleaner touches a visible area until it’s been vetted in a hidden spot.
- Know Your Material’s Enemy: Water damages leather, solvents crack vinyl, and bleach ruins cloth.
- Start Mild, Escalate Carefully: Dish soap and water are your first line of defense for most materials and spills.
- Speed is Your Ally: The faster you address a spill, the less likely it is to become a permanent stain.
Keep this action plan in mind, and you can tackle most interior messes with confidence and avoid costly mistakes.