The biggest mistake in stain removal isn’t using the wrong cleaner—it’s treating your suede sneakers like your concrete patio. That one-size-fits-all approach is how a beloved pair of shoes gets ruined or a beautiful deck gets permanently etched. This frustration is exactly why you need a material-first strategy. This comprehensive shoe and outdoor stain removal guide cuts through the generic advice to give you a clear, category-by-category roadmap. We’ll move from the delicate nap of suede to the tough porosity of composite decking, providing actionable, step-by-step outdoor surface stain tips for each. Consider this your survival manual for preserving everything from your favorite kicks to your entire patio setup, turning panic into a methodical, effective cleaning process.
The key to removing stains from shoes and outdoor surfaces is to match your cleaning method to the specific material first, then the stain. Always start by blotting (never rubbing) excess liquid and testing any cleaner in an inconspicuous area to prevent damage. Your core principle is a gentle-to-aggressive approach: begin with the mildest solution, like water or a mild soap, and only progress to stronger treatments if necessary. Proper drying and aftercare are just as critical as the cleaning itself to prevent watermarks, mildew, or material damage.
The Universal Stain Removal Framework: Your 10-Step Pre-Check
Before you grab a brush and the nearest bottle of cleaner, pause. The most effective shoe cleaning techniques and outdoor surface care routines share a common starting point: a systematic approach. This framework isn’t just a suggestion—it’s your insurance policy against turning a small stain into a permanent flaw. Follow these ten steps every single time to build a methodical, safe mindset. shoe cleaning techniques and outdoor

Your Actionable Pre-Checklist
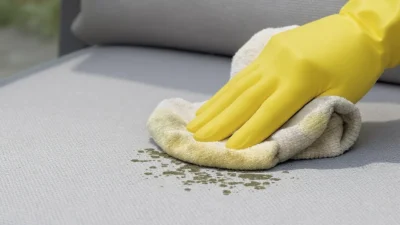
- Safety & Prep: Put on gloves. Ventilate the area if using strong chemicals.
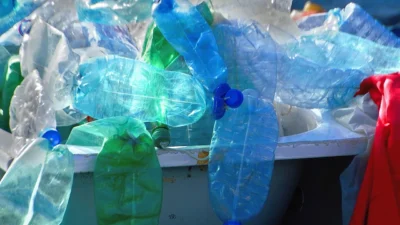
- Material Identification: This is your #1 priority. Is it sealed leather? Porous concrete? Solution-dyed acrylic fabric? The material dictates everything that follows.
- Stain Identification: Determine what caused the stain. Is it organic (mud, grass), oily (grease, sunscreen), or a dye (ink, wine)?
- Gather Correct Tools: Based on steps 2 and 3, assemble soft brushes, microfiber cloths, appropriate cleaners, and plenty of clean water.
- Spot Test: Apply your chosen cleaner to a hidden area. Wait, then check for color bleed, texture change, or damage. Never skip this.
- Gentle Method First: Always start with the mildest option—like dabbing with water and a mild soap—before escalating to stronger solutions.
- Progress to Targeted Solutions: If the gentle approach fails, move to a cleaner specifically formulated for that stain type on that material.
- Rinse/Neutralize: Thoroughly remove all cleaning residue with water or a neutralizing agent (like a water/vinegar solution for alkaline cleaners) to prevent damage.
- Dry Properly: Air dry away from direct heat or sunlight. For fabrics, blot excess moisture with towels. For shoes, stuff with paper to retain shape.
- Protect Post-Cleaning: Once fully dry, apply a relevant protectant—fabric guard, suede spray, or deck sealant—to guard against future spills.
Sneaker Salvation: A Material-Specific Guide (Canvas, Leather, Suede, Mesh)
Your sneakers are a collection of different surfaces, each demanding respect. Treating them all the same is the fastest way to ruin a favorite pair. This sneaker stain removal guide breaks it down by material, because a grass stain on canvas requires a different tactic than on suede.
Canvas & Synthetic Uppers
These are the workhorses and the easiest to clean. For mud and dirt, let it dry completely, then brush off the bulk. For stains, create a solution of warm water and a small amount of dish soap or a dedicated sneaker cleaner. Use a soft-bristled brush (an old toothbrush works) to gently scrub in a circular motion. Rinse with a damp cloth and air dry. For stain removal for tough materials like set-in grass or ink on canvas, a paste of baking soda and water can be used as a gentle abrasive before washing.
Leather (Smooth & Patent)
Leather needs cleaning plus conditioning. Wipe away surface dirt with a damp microfiber cloth. For stains, use a leather-specific cleaner. Apply with a soft cloth, working in small sections, then wipe with a clean, damp cloth. Never soak leather. Once dry, apply a leather conditioner to replenish oils and maintain suppleness. This two-step process is the core of proper specialty material stain cleaning for leather goods.
Suede & Nubuck
The most delicate common materials. Never use water or liquid cleaners initially, as they can leave permanent watermarks. First, use a dry suede brush or a clean, dry microfiber towel to brush the nap and lift surface dirt. For scuffs or oily marks, use a suede eraser (a rubbery, gritty block). Gently rub the affected area until the mark lifts, then re-brush the nap.
Reviving the Suede Nap
- Always brush in one direction to realign the fibers.
- For stubborn, dried stains, a specialized suede cleaning foam can be used sparingly. Apply to a brush, not directly to the material.
- After any cleaning, let the shoe dry completely, then use a suede brush vigorously to restore the velvety texture.
- Consider a suede protector spray after cleaning to create an invisible barrier.
Synthetic Mesh & Knits
These materials are designed to be breathable and lightweight, but can trap dirt. A gentle hand wash is often best. Remove laces and insoles. Use a soft brush and a mild soap solution to gently scrub, paying attention to the mesh panels. Rinse thoroughly by dabbing with a very wet cloth—avoid submerging if the shoe has a glued sole. Stuff with paper towels or a shoe tree and air dry away from heat.
Patio & Deck Stain Warfare: Concrete, Wood, and Composite
Outdoor surfaces face constant assault from weather, food, and furniture. Your strategy must match the surface’s porosity and composition. These outdoor surface stain tips focus on using the right cleaner in the right way to avoid costly damage.
Concrete Patios & Walkways
Do: For general dirt and mildew, use a solution of oxygen bleach (sodium percarbonate) and warm water. It’s color-safe and less harsh than chlorine bleach. Scrub with a stiff-bristled broom. For oil stains, apply a paste of baking soda or a commercial concrete degreaser, let it sit, then scrub and rinse.
Don’t: Use chlorine bleach indiscriminately, as it can damage surrounding plants and degrade concrete over time. Avoid using metal brushes, which can leave scratch marks.
Wood Decks
Do: Start by sweeping away debris. Use a deck cleaner formulated for your wood type (e.g., a brightener for grayed wood). Apply according to directions, scrub with a deck brush, and rinse thoroughly. Always let the wood dry completely before applying a sealant or stain.
Don’t: Use a pressure washer on its highest setting, which can gouge soft wood and drive moisture deep into the boards. Don’t use generic household cleaners that can strip the wood’s natural oils.
Composite Decking
Do: Check the manufacturer’s guidelines first—this is non-negotiable. Most composites clean well with a mild soap and water solution. For stubborn stains, a dedicated composite deck cleaner is safest.
Don’t: Use abrasive pads, steel wool, or solvent-based cleaners, as they can scratch and dull the composite’s surface permanently. Avoid oil-based cleaners.
Specialty Outdoor Materials: Umbrellas, Cushions, and All-Weather Rugs
This is where specialty fabric stain treatment becomes critical. These materials are engineered for durability but have specific vulnerabilities. Using the wrong product can strip water repellency or set a stain.
You haul the patio cushions out of storage in spring, only to find a few faint, dark spots and that unmistakable musty smell. It’s a common frustration, but acting quickly with the right method can usually solve it.
Outdoor Fabric (Sunbrella, Solution-Dyed Acrylic)
These high-performance fabrics are designed for easy cleaning. For most food and drink spills, a prompt blotting followed by a solution of mild soap (like Dawn) and warm water, applied with a soft brush, works wonders. Rinse thoroughly with a hose. For mildew, use a solution of one cup bleach, one cup mild soap, and a gallon of water. Always spot-test first, even on solution-dyed fabrics. Apply, let sit for 15 minutes, scrub gently, and rinse completely.
All-Weather (Polypropylene) Rugs
These rugs can often be hosed off and scrubbed with a broom and mild detergent. For ground-in dirt, you can sometimes even take them to a DIY car wash for a gentle pressure wash. The key is thorough drying—hang them over a railing or lay them flat until completely dry on both sides to prevent mildew.
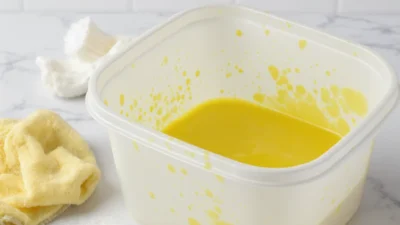
Plastic & Resin Furniture
For general grime, a mixture of dish soap and water is sufficient. For mildew in crevices, a solution of vinegar and water or a dedicated plastic cleaner can be used. Avoid abrasive scouring pads that can create micro-scratches where dirt will accumulate faster next time.
The Stain Identifier: Matching the Solution to the Spill
Before applying a material-specific method, diagnose the stain type. This cross-reference guide helps you choose the right general weapon for the battle.
Organic Stains (Mud, Grass, Food, Blood)
These are protein or plant-based. General Treatment: Use cold water initially (hot water can set protein stains). Enzyme-based cleaners (like those for pet stains) are highly effective as they break down organic matter. For dried mud, let it dry completely and brush off first.
Oil & Grease Stains (Cooking oil, sunscreen, lotion)
These repel water. General Treatment: Dishwashing liquid (like Dawn) is designed to cut through grease. Apply a small amount directly, let it sit to emulsify the oil, then launder or rinse according to the material’s care instructions.
Tannin Stains (Wine, Coffee, Tea, Fruit Juice)
These are acidic plant dyes. General Treatment: Act quickly. Blot, then rinse with cold water. White vinegar can help neutralize the stain on some color-safe surfaces, but test first. For fabrics, a paste of baking soda and water can help lift the stain.
Dye Stains (Ink, Berries, Artificial Coloring)
These are potent pigments. General Treatment: Rubbing alcohol (isopropyl alcohol) can be effective on many non-porous surfaces and some fabrics. Apply a small amount to a clean cloth and dab (don’t rub) from the outside of the stain inward to prevent spreading. Always test in a hidden area first.
Common Pitfalls & How to Avoid Them
Even with the best intentions, simple mistakes can cause irreversible damage. Here are the most frequent errors in outdoor material maintenance and shoe care.
- Using Heat to Dry: Placing wet shoes on a radiator or using a hair dryer can warp materials, melt glues, and set stains by baking them in. Always air dry at room temperature.
- Scrubbing Textured Surfaces: Vigorously rubbing suede, nubuck, or some outdoor fabrics flattens the nap and grinds the stain deeper. Blot liquids and use specialized brushes or erasers.
- Using Abrasive Cleaners on Acrylics: Scouring powders or steel wool on acrylic patio furniture or composite decking creates tiny scratches, making the surface look dull and attracting more dirt.
- Mixing Cleaning Chemicals: Never mix bleach with ammonia or vinegar. This creates toxic chlorine or mustard gas. Use one product at a time and rinse thoroughly before switching.
- Applying Protectant to a Damp Surface: Sealing in moisture with a waterproofer or deck sealant traps it, leading to mildew, rot, or adhesive failure. Ensure the item is bone dry first.
- Using Vinegar on Natural Stone: The acid in vinegar can etch and dull marble, limestone, or travertine patios. Use a pH-neutral stone cleaner instead.
Advanced Tactics & When to Call a Pro
For stains that laugh at your initial efforts, or for high-value items, you need a more nuanced plan—and the wisdom to know when to stop.
Advanced DIY Techniques
For set-in oil stains on driveways, a poultice (a paste of absorbent powder like diatomaceous earth and a solvent) can draw the stain out over 24-48 hours. For persistent organic smells in outdoor rugs, repeated applications of an enzyme cleaner may be necessary. Always research the technique for your specific material first.
Clear Red Flags for Professional Help
Call a restoration professional when you encounter: 1) Major mold infestation on porous materials like untreated wood or drywall, which can be a health hazard. 2) Structural damage like deep cracks in concrete or rotting wood deck boards. 3) Irreplaceable or antique items where the risk of DIY error is too high. 4) Stains that have physically altered the material (like etching on stone) rather than just discolored it.
The Aftercare Protocol: Drying and Protecting Your Surfaces
Cleaning is only half the job. Improper drying can cause watermarks, mildew, and material warping, undoing all your hard work. Then, a protectant seals your success.
Drying: The Non-Negotiable Step
Do: Air dry in a well-ventilated area, away from direct sunlight and heat sources. Use fans to circulate air. For shoes, stuff them with white paper towels or shoe trees to absorb moisture and maintain shape. For cushions, stand them on their sides if possible to allow airflow to all surfaces.
Don’t: Use hair dryers, space heaters, or place items in a closed, damp garage. Don’t reassemble furniture or walk on decks until they are completely dry to the touch and underneath.
Protection: Your Future Shield
Do: Apply a protectant suited to the material once it’s fully dry. This includes fabric waterproofing spray for outdoor cushions, suede/nubuck protector for shoes, and a quality water-repellent sealant for wood decks. Reapply these protectants as recommended (usually once a season or year).
Don’t: Use a generic “waterproofer” on all materials. A silicone-based spray might be great for canvas but can ruin leather. Read labels to ensure product compatibility.
Stain Removal is a Skill, Not a Guess
The frustration of a stubborn stain often comes from the feeling that you’re just guessing. But as this guide shows, effective cleaning is a repeatable skill built on a simple, material-first philosophy. You now have a clear roadmap: identify, test, start gentle, and progress methodically. Whether it’s your favorite sneakers or your entire patio, this knowledge lets you approach messes not with dread, but with a plan. Remember, the goal isn’t just to remove a stain—it’s to preserve the things you love to use and live with, for seasons to come.
This guide has armed you with a systematic approach to tackling stains on shoes and outdoor surfaces. The core pillars are universal: always identify the material first, follow a safe pre-check framework, and start with the gentlest method. For sneakers, match your technique to the fabric—gentle soap for canvas, specialized cleaners for leather, and dry tools for suede. For patios and decks, choose cleaners formulated for your specific surface (concrete, wood, composite) and avoid abrasive tools. For specialty outdoor fabrics, act quickly with appropriate cleaners and prioritize thorough drying. Finally, avoid common pitfalls like using heat to dry or mixing chemicals, and know when a job requires a professional. With this material-focused strategy, you can clean with confidence.
Q: Can I use the same cleaner on my leather boots and my patio?
A: Almost never. Leather requires pH-balanced, conditioning cleaners to preserve its oils, while patio cleaners are often alkaline or acidic to break down organic growth and dirt. Using a patio cleaner on leather will dry it out and cause cracking, while a leather cleaner will do nothing for concrete. Always match the cleaner to the material.
Q: What’s the one household product I should always have for outdoor stains?
A: Oxygen bleach (sodium percarbonate). It’s a versatile, color-safe, and plant-friendlier alternative to chlorine bleach. It effectively tackles mildew, organic stains, and general grime on concrete, wood (with caution), and many outdoor fabrics without the harshness, making it a cornerstone of out