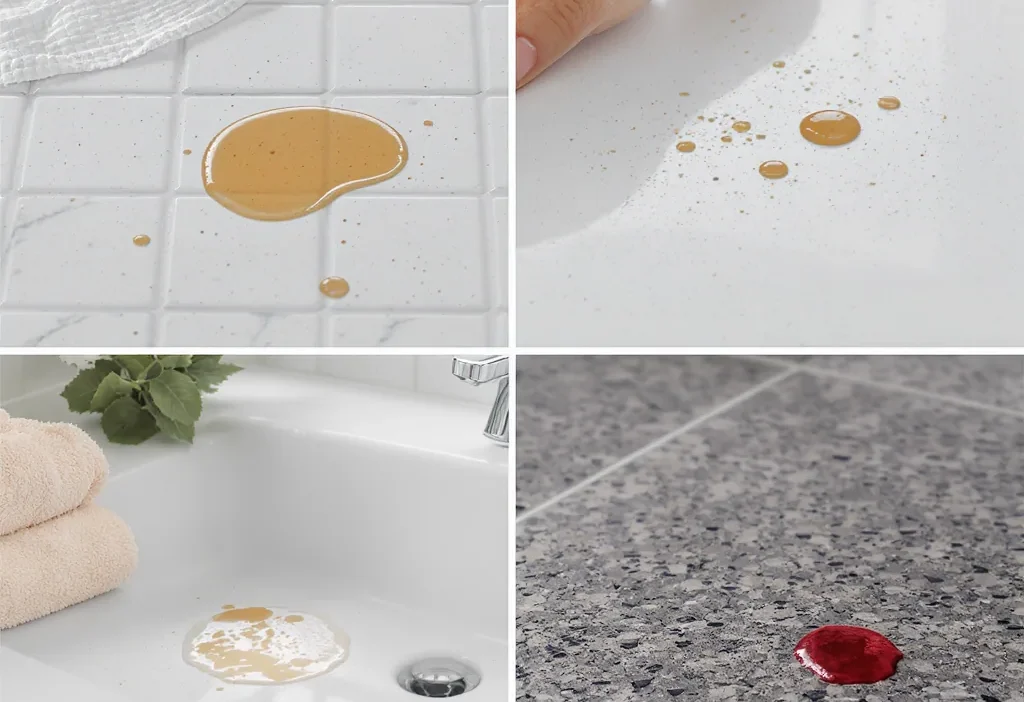
You turn away for one second, and there it is—a perfect, terrifying ring of red wine on your pristine quartz countertop. Or perhaps it’s the creeping rust stain in your shower grout that appeared overnight. That initial jolt of panic is universal, but here’s the professional secret: most stains are not a life sentence for your surfaces. The difference between a spotless recovery and a permanent mark lies entirely in matching the right method to the specific material. This definitive hard surface stain removal guide is built on that core principle. We’re moving beyond one-size-fits-all advice that can damage delicate stone or leave grease on laminate. Instead, this is a master playbook, starting with universal safety rules before diving into tailored protocols for your kitchen counters, bathroom tile, natural stone, and more. Consider it your first-response manual for turning those moments of dread into confident, effective action.
Successful hard surface stain removal hinges on three things: correctly identifying the surface material (e.g., sealed granite vs. porous marble), diagnosing the stain type (organic, oily, metallic, etc.), and always starting with the gentlest method—like a pH-neutral dish soap solution—before escalating. The single non-negotiable rule is to test any cleaner in a hidden spot first. This guide will walk you through a safe, step-by-step protocol for any surface, then provide specific playbooks for kitchens, bathrooms, and stone.
The Universal Pre-Clean Checklist: Safety First
Before you even reach for a spray bottle, a successful hard surface stain removal guide hinges on two critical diagnoses: the material you’re cleaning and the stain you’re fighting. Getting this wrong is how a simple cleanup becomes a costly repair. This checklist prevents 90% of cleaning disasters.
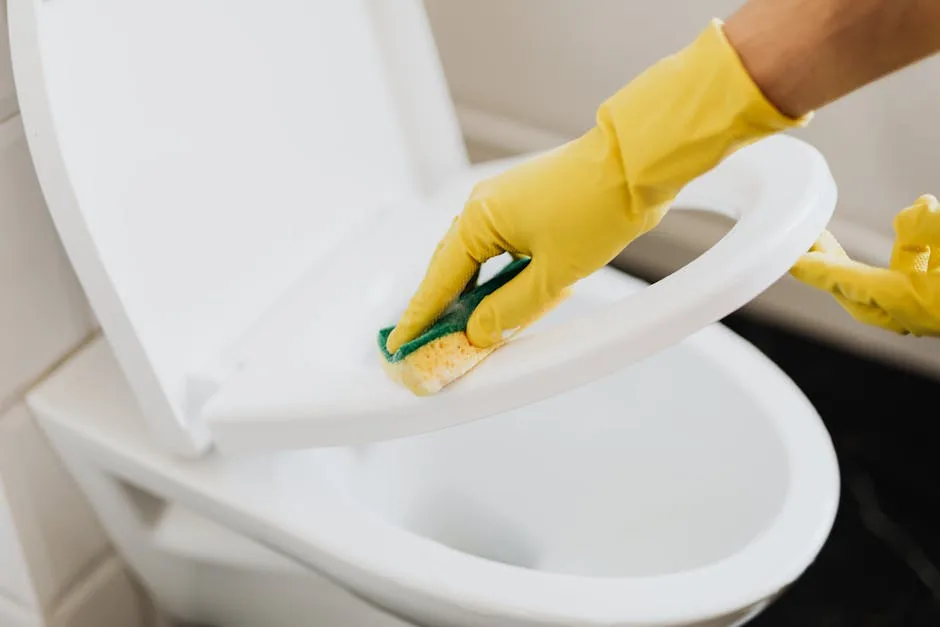
Photo by www.kaboompics.com on Pexels
Step 1: Identify Your Surface
Is it natural stone (like marble or granite) or man-made (like quartz or porcelain)? For natural stone, the single most important question is: is it sealed? A simple water test can tell you—if water beads on the surface, it’s likely sealed; if it darkens the stone immediately, it’s porous and unsealed. This dictates everything that follows.
Step 2: Identify the Stain Type
Stains aren’t monolithic. Matching the cleaner to the stain chemistry is half the battle. Here’s a quick guide:
- Organic: Coffee, wine, food, pet accidents. These are often water-based and respond to alkaline cleaners or oxygen bleach.
- Oil/Grease: Cooking oil, butter, lotion, cosmetics. These repel water and need a degreaser or a absorbent poultice.
- Metallic/Rust: From metal cans, fixtures, or water. Requires a specialized rust remover (often acidic).
- Dye/Pigment: Turmeric, berry juice, hair dye. These can penetrate deeply and may need a poultice or specialized solvent.
- Mineral/Hard Water: White, chalky deposits from evaporated water. Acidic cleaners like vinegar dissolve them.
The golden rule that overrides all others? Always test your chosen cleaner in an inconspicuous area first. Wait a few minutes, then rinse and check for discoloration or etching. This non-negotiable step is your insurance policy.
Your 10-Step Stain Removal Protocol
This is your universal playbook. Whether you’re tackling a kitchen grease splatter or a bathroom grout stain, follow this methodical workflow to clean effectively and safely.

Steps 1-3: Diagnosis & Preparation
- Identify the Material: Confirm the surface type and its sealant status.
- Identify the Stain: Determine the most likely stain category (organic, oil, etc.).
- Gather Safe Supplies: Based on your diagnosis, assemble pH-neutral soap, specialized cleaners, soft cloths, a plastic scraper, and gloves. Ensure good ventilation.
Steps 4-7: The Cleaning Process
- Clear & Protect the Area: Remove items from the surface. Protect adjacent materials if using strong chemicals.
- Address Fresh Stains: For wet spills, immediately blot—don’t rub—to lift liquid. Gently scrape off solids with a plastic tool.
- Test Your Cleaner: In a hidden corner, apply your planned solution. Rinse, dry, and inspect for damage.
- Apply from Gentlest to Strongest: Start with a mild dish soap and warm water solution. Work in small sections, agitating gently with a soft cloth or brush.
Steps 8-10: Rinse & Review
- Rinse Thoroughly: Residue is the enemy. Use a clean, water-dampened cloth to wipe away all cleaning solution.
- Dry Completely: Buff the area dry with a clean microfiber cloth to prevent water spots or new stains from forming.
- Assess & Escalate if Needed: Did the stain lighten or disappear? If not, allow the area to dry fully, then reassess. Only then should you move to a stronger, material-appropriate treatment.
Pro-Tip: The 24-Hour Rule
For deep or old stains, patience is a tool. After applying a poultice or heavy-duty cleaner, cover it with plastic wrap and let it work for 12-24 hours. This gives the active ingredients time to draw the stain out without evaporating.
Kitchen Countertop Stain Playbook: Laminate, Quartz, Granite
Your kitchen stain cleaning guide needs to be as versatile as your counters. Each material has its own rules of engagement.
Laminate & Solid Surface
These are stain-resistant but not invincible. Avoid abrasive pads that can dull the finish. For grease or food stains, a paste of baking soda and water applied gently, left for 10 minutes, and wiped clean works wonders. For tougher dye stains (berry, turmeric), a dab of non-gel toothpaste or a paste of baking soda and hydrogen peroxide can be effective. Always rinse well.
Engineered Quartz
Quartz is non-porous, making it highly stain-resistant. For most spills, warm soapy water is sufficient. For dried-on food or oil, use a plastic scraper to gently lift the bulk, then clean with a non-abrasive household cleaner. Crucially, avoid harsh alkaline cleaners (like some heavy-duty degreasers) or potent solvents like acetone, as they can damage the resin binder. For a comprehensive care guide, manufacturers like Caesarstone provide excellent resources.
Natural Stone (Granite, Marble)
This is where caution pays. Never use vinegar or lemon juice on granite or marble—the acid will etch the surface, creating a dull spot. For sealed granite, a pH-neutral stone cleaner is best for daily use. For an oil stain on granite, make a poultice with baking soda and water (to a thick paste), apply it over the stain, cover with plastic wrap, and let it sit overnight. The paste draws the oil out as it dries.
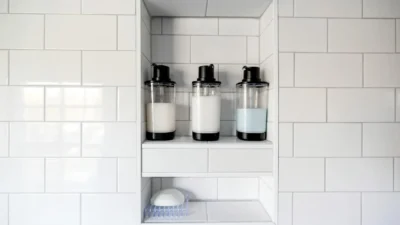
Bathroom Surface Rescue: Tile, Grout, & Porcelain
Bathroom stain removal tips must combat a unique trio: soap scum, hard water minerals, and organic mold. Your approach depends on the battlefield.
Ceramic & Porcelain Tile
For soap scum and hard water stains on glazed tile, an acidic cleaner is your friend. A solution of equal parts white vinegar and water sprayed on, left for 5-10 minutes, and scrubbed with a non-abrasive brush will cut through the film. Rinse thoroughly to prevent the vinegar smell from lingering.
Grout (The High-Maintenance Hero)
Discolored grout is often a combination of dirt and mildew. For a basic clean, scrub with an old toothbrush and a paste of baking soda and water. For stubborn stains or mildew, oxygen bleach (like a hydrogen peroxide-based grout cleaner) is safer for colored grout than chlorine bleach, which can yellow it over time. After a deep clean, consider applying a grout sealer to prevent future stains.
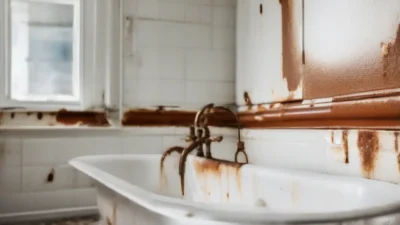
Porcelain Fixtures & Glass Doors
Rust stains around drains or on tubs require a targeted approach. A commercial rust remover gel, applied precisely according to label instructions, is often necessary. For hard water spots on glass shower doors, the vinegar solution works, but for heavy buildup, a dedicated hard water stain remover containing citric or phosphoric acid will be more effective with less elbow grease.
You know the scene: you’ve scrubbed the shower tile with generic cleaner, but a shadow of the stain remains in the grout lines, mocking your effort. This is the moment to switch tactics—from a broad-surface cleaner to a targeted, paste-like application you can let dwell on the precise problem area, which is often the key to bathroom stain removal success.
Stone & Tile Deep Clean: Natural Stone, Slate, Terracotta
Porous natural materials demand respect. A stone surface cleaning guide is fundamentally about understanding and working with porosity, not against it.
The Sealed vs. Unsealed Stone Rule
This distinction cannot be overstated. Sealed stone has a protective barrier; you can use mild, pH-neutral cleaners with confidence. Unsealed stone—like many marbles, limestones, and slates—will absorb liquids instantly. For these, your cleaning “solution” is often a damp cloth, not a wet one. The moment you introduce a liquid cleaner, you risk driving the stain deeper.
Calcareous Stone Alert (Marble, Travertine, Limestone)
These stones are sensitive to acids. That means no vinegar, no lemon juice, no toilet bowl cleaner. Even some “natural” stone cleaners are acidic. Etching from acid creates a permanent dull mark. For an oil stain on unsealed marble, a poultice made from a specialized stone cleaning powder (like calcium carbonate) and hydrogen peroxide is the professional-recommended method.
Slate & Terracotta
These are often unsealed or have a matte, natural finish. Dirt becomes ingrained. The safest method is to use a dedicated stone soap or a very mild, phosphate-free detergent in warm water. Agitate with a soft brush, rinse with a barely-damp mop or cloth, and dry immediately. For persistent stains, a poultice may be needed, and for high-traffic terracotta, professional re-sealing is the best long-term defense.
What Not to Do: Common Mistakes That Cause Damage
Sometimes, knowing what to avoid is as important as knowing what to do. Here are the most frequent errors that turn a stain into a permanent flaw.
- Don’t use acidic cleaners on natural stone. Why: Vinegar, lemon, or acidic bathroom cleaners etch calcareous stone (marble, travertine, limestone), leaving a permanent dull spot. Instead: Use only pH-neutral cleaners formulated for stone.
- Don’t use abrasive scrub pads on glossy surfaces. Why: Steel wool or harsh green scrub pads will scratch glass, glossy tile, and acrylic surfaces, creating a fog of micro-scratches. Instead: Use soft cloths, nylon brushes, or melamine foam (Magic Eraser) with gentle pressure.
- Don’t mix cleaning chemicals, especially bleach and ammonia. Why: This combination creates toxic chloramine gas. It’s dangerous and unnecessary. Instead: Use one product at a time, and always rinse the area thoroughly before switching cleaners.
- Don’t let a cleaning poultice dry completely into a hard cake on delicate stone. Why: Removing it can be difficult and may scratch the surface. Instead: Cover the poultice with plastic wrap to slow drying, and remove it while it’s still slightly damp.
- Don’t neglect the rinse step. Why: Soap or chemical residue attracts dirt, creating a film that looks like a new stain. Instead: Always follow cleaning with a thorough rinse of clean water and a dry buff.
Troubleshooting Stubborn Stains & Next Steps
You followed the protocol, but the stain persists. Don’t panic—escalate strategically.
Diagnose the Holdout
Is the stain truly a stain, or is it physical damage? An etch on marble feels rough to the touch and is a loss of material, not a surface deposit. A dye stain that has penetrated deep into unsealed porous tile may be beyond a surface clean. If your gentle and medium-strength attempts failed, the stain is likely deeply set or chemically bonded.
Last-Resort Tactics
For organic holdouts in grout or porous tile, consider an enzymatic cleaner designed for biological stains. For rust, a commercial rust remover applied with precision is your next step. For deep oil in stone, a professional-grade poultice powder may be required. You can find these at stone supply or specialty hardware stores.
When to Call a Professional
If the stain is large, on a valuable surface, or has not responded to your careful efforts, it’s time to call in a stone restoration or tile cleaning pro. They have industrial-grade poultices, extraction tools, and polishing equipment that can often salvage what seems unsalvageable. This is also the best course for suspected etching, which requires mechanical refinishing.
Your Stain Removal Journey Starts Now
Armed with this guide, you’re no longer at the mercy of mysterious spots and splatters. The most powerful step you can take is to apply this knowledge immediately. Look around your home right now—pick one persistent stain, perhaps on a kitchen counter or in a bathroom corner. Identify the material. Deduce the stain type. Then, methodically apply the gentlest appropriate method from your new protocol.
Remember, successful cleaning isn’t about brute force; it’s about smart strategy. By matching your method to the material and progressing patiently from mild to strong, you’ll not only remove stains but also preserve your surfaces for years to come. You’ve got this.
This hard surface stain removal guide is built on a core philosophy: diagnose before you attack. The right method depends entirely on your surface material and the stain type. Always test cleaners first and progress from gentle to strong.
- For Kitchens: Identify your countertop material. Avoid acids on stone, use degreasers for oil on laminate, and leverage quartz’s non-porous nature with simple soap and water.
- For Bathrooms: Combat soap scum with acidic solutions on tile, use oxygen bleach for grout mildew, and target rust stains with specialized removers.
- For Natural Stone & Tile: Determine if it’s sealed. Never use acidic cleaners on calcareous stone like marble. For deep stains, a poultice is often the solution, not a harsher chemical.
Q: Can I use vinegar to clean all hard surfaces?
A: Absolutely not. Vinegar is an acid and will permanently etch (dull) calcareous natural stones like marble, travertine, and limestone. It’s safe for ceramic/porcelain tile and glass, but always test first and avoid using it on granite or quartz long-term, as it can degrade sealants and resins.
Q: How do I know if my natural stone is sealed?
A: Perform a water test. Sprinkle a few drops of water on the stone in an inconspicuous spot. If the water beads up, the stone is likely sealed. If it darkens the stone quickly and is absorbed, the stone is porous and unsealed. A sealed surface repels liquids, giving you more cleaning flexibility.
Q: What’s the safest way to remove hard water stains from a glass shower door?
A: Start with a 50/50 solution of white vinegar and water. Spray it on, let it sit for 5-10 minutes to dissolve the mineral deposits, then scrub with a non-abrasive pad and rinse. For heavier buildup, a commercial hard water stain remover containing citric acid is more effective. Dry the glass after each shower to prevent new spots.
Q: Is bleach safe for colored grout?
A: Use caution. Chlorine bleach can cause colored grout to fade or yellow over time. For mildew and stains on colored grout, a oxygen-based bleach (hydrogen peroxide) cleaner is a safer, color-safe alternative that is often just as effective for bathroom stain removal.
Q: When should I call a professional for stain removal?
A: Call a professional if the stain is on a valuable or irreplaceable surface, if you’ve tried appropriate methods without success, or if you suspect the mark is actually physical damage (like etching). Professionals have stronger poultices, extraction tools, and polishing equipment to handle deep-set or complex stains.