You’ve just settled into your favorite chair with a morning coffee, ready to enjoy the fresh air, when you see it: a suspicious greenish patch blooming on the cushion after a week of spring rain. That moment of discovery—whether it’s mold, a chalky bird dropping, or a stubborn water line—can instantly deflate the joy of your outdoor sanctuary. But here’s the good news: with the right knowledge, these common blights don’t have to be permanent. This isn’t a one-size-fits-all lecture; it’s your practical, stain-specific playbook. We’ll cut through the confusion and provide clear protocols for the most frequent offenders, empowering you to restore your patio furniture with confidence and keep your outdoor living space looking its best.
The best way to tackle outdoor fabric stains is to first identify the stain type, then use a targeted cleaning protocol. For most organic stains like mold and bird droppings, a solution of mild dish soap and warm water applied with a soft brush is a safe and effective starting point. The right approach depends entirely on the stain type and fabric, but gentle cleaning and prompt action are key for restoring your cushions without causing damage.
Your Pre-Cleaning Protocol: The Non-Negotiable First Steps
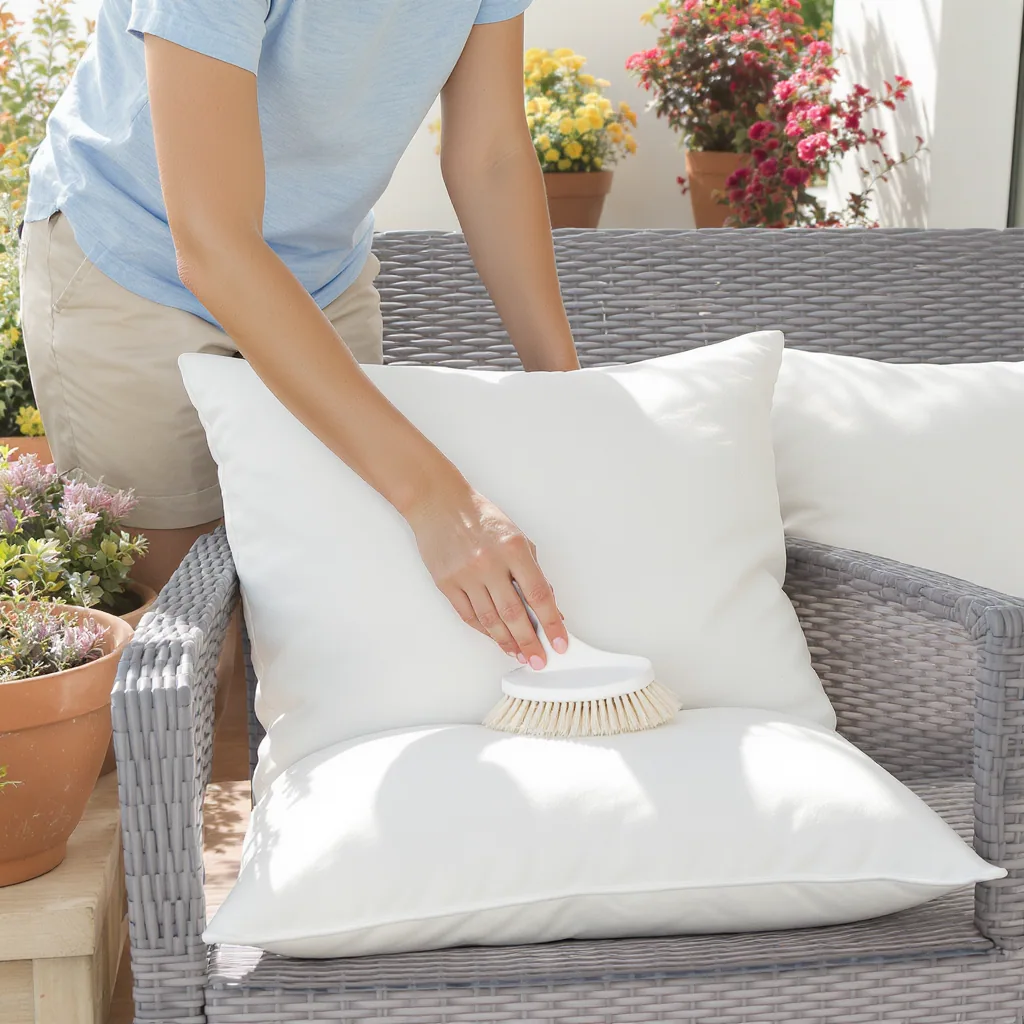
Before you attack any stain, you need a game plan. Jumping straight in with a random cleaner is the fastest way to damage your fabric. This universal protocol is your safety net, ensuring every stain removal attempt starts on the right foot. Think of it as the essential foundation of any outdoor fabric stain removal guide.
Photo by www.kaboompics.com on Pexels
Step 1: Identify Your Fabric
Most modern outdoor fabrics are solution-dyed acrylic (like Sunbrella), polyester, or olefin. These are generally stain-resistant, but their care can differ. Check for a tag sewn into a seam—it’s your first source of truth. If there’s no tag, a quick online search of your furniture brand or a visual check (Sunbrella often has a distinctive, tightly woven texture) can help.
Step 2: Gather Your Arsenal
You don’t need specialty chemicals. For 90% of jobs, these household items will suffice:
- Soft-bristled brush (a nail brush or soft kitchen brush)
- White microfiber cloths or sponges (colored cloths can transfer dye)
- Mild liquid dish soap (clear, dye-free)
- White vinegar
- Oxygen bleach (like OxiClean)
- Garden hose with a spray nozzle
- Bucket of warm water
Step 3: The Critical Spot Test
This step is non-negotiable. Mix a small amount of your planned cleaning solution (e.g., a drop of soap in water). Apply it to a hidden area of the cushion, like the bottom or an inside seam. Wait for it to dry completely. Check for any color bleeding, fading, or texture change. If it passes, you’re clear for takeoff.
Once you’ve completed these steps, you’re ready to tackle the specific stain with confidence, turning a moment of panic into a simple patio cushion stain cleaning project.
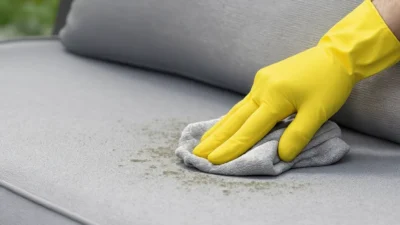
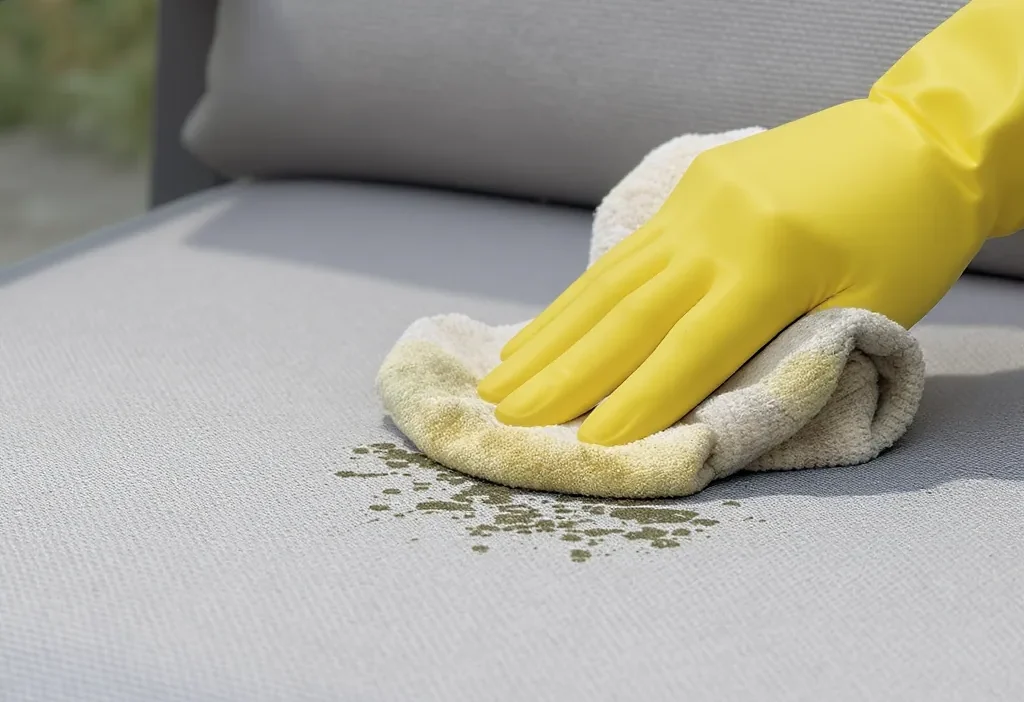
Scenario 1: Conquering Mold and Mildew Stains
Those greenish-black splotches or fuzzy patches are a telltale sign of mold or mildew—a common issue when moisture meets organic material (like pollen or dirt) on fabric. The key is to kill the spores and remove the stain without harming the fibers. Prompt action is crucial for outdoor furniture stain care.
The Cleaning Sequence
For Light Mold: A vinegar solution is often effective and gentle. Mix one part white vinegar with one part warm water. Using a soft brush, gently scrub the affected area. Let it sit for 10-15 minutes, then rinse thoroughly with a hose.
For Stubborn or Heavy Mold: Oxygen bleach is your ally. Follow the package directions to create a solution (typically 1 scoop per gallon of warm water). Apply with a brush, allow it to dwell for up to 15 minutes, then rinse exhaustively. Important: Do not use chlorine bleach unless the manufacturer’s tag explicitly says it’s safe, as it can degrade fibers and strip color.
The Non-Negotiable Finale: Dry Completely
This is the most important step to prevent immediate recurrence. After rinsing, use a dry towel to blot away excess moisture. Then, place the cushions upright in full, direct sunlight. The sun is a powerful disinfectant and dryer. Leave them out until every layer is bone-dry. For persistent problems, consider applying a fabric mold inhibitor, like those recommended by the Sunbrella fabric care guide, after cleaning.
Scenario 2: Removing Bird Droppings and Food Spills
Bird droppings are a double threat: acidic and protein-based. Left untreated, the acid can degrade fabric dyes and fibers, while the protein sets into a stubborn stain. Your goal is to neutralize and lift without grinding it deeper.
For Fresh Stains: The “blot, don’t rub” technique is paramount. First, gently scrape off any solid matter with a dull edge. Then, dampen a white cloth with a solution of mild dish soap and cool water. Blot the stain from the outside in, lifting the residue. Rinse the area by blotting with a cloth dipped in clean water.
For Dried, Set-In Stains: You may need to soften the deposit first. Lay a damp (not soaking) cloth over the stain for 15-20 minutes to rehydrate it. Then, proceed with the soapy blotting method. For truly stubborn organic stains, an enzymatic cleaner (designed for pet stains) can be very effective at breaking down the proteins.
Pro Tips for Pesky Organic Stains
- Act Fast: The sooner you address bird poop on outdoor fabric, the less time the acid has to work.
- Cool Water is Key: Hot water can cook the protein, making it set permanently.
- Patience Over Pressure: Repeated, gentle blotting is better than aggressive scrubbing.
- Check Your Progress: Let the area dry completely to see if the stain is truly gone before storing the cushion.
Scenario 3: Fading Weather Marks, Pollen, and Dirt
Not every mark is a dramatic stain. Often, it’s the cumulative grime from the elements—a dusty film of pollen, water line marks from rain, or general fading from UV exposure. This aspect of patio cushion stain cleaning is more about gentle rejuvenation than intensive treatment.
The Gentle Overall Clean
For general soiling, a routine clean is best. Mix a few drops of mild dish soap into a bucket of warm water. Using a soft brush, gently scrub the entire cushion surface in sections. Immediately rinse each section thoroughly with your hose before moving on, ensuring no soap residue remains. Soap residue can attract more dirt.
Dealing with Fading and Water Marks
UV fading is often permanent, but you can brighten fabric. A thorough cleaning with the soap method above can remove a layer of grime that masks the true color. For subtle water marks or mineral deposits (common in hard water areas), a light scrub with a vinegar-water solution (1:1) can help break them down before a full rinse.
The best treatment for weather stains is prevention. After a deep clean and once the fabric is completely dry, applying a fabric protectant spray can create a barrier against future stains, making your next clean-up much easier. This turns reactive cleaning into proactive outdoor furniture stain care.
The Dos and Don’ts of Outdoor Fabric Care
This quick-reference table distills the core lessons from our stain scenarios. Stick to these guidelines to keep your patio furniture looking its best for seasons to come.
| Do | Don’t |
|---|---|
| Blot stains gently from the outside in. | Scrub vigorously, which grinds stains deeper. |
| Spot test every cleaner in an inconspicuous area. | Assume all cleaners are safe for your fabric. |
| Dry cushions completely in the sun before storing. | Store cushions while damp, inviting mold. |
| Use soft brushes and white cloths. | Use abrasive pads or stiff wire brushes. |
| Rinse thoroughly to remove all soap residue. | Leave cleaner to dry on the fabric. |
| Clean regularly to prevent deep-set stains. | Wait for stains to become severe before acting. |
Shift from Stain Removal to Stain Prevention
Mastering these scenarios transforms you from a reactive cleaner to a proactive caretaker. The real secret to a pristine patio isn’t heroic stain removal—it’s avoiding the big battles altogether. Establish a simple, seasonal rhythm: a gentle overall clean at the start and end of the season, prompt spot-cleaning of spills, and consistent use of breathable furniture covers during long wet spells. Consider applying a quality fabric guard after a deep clean; it’s like an invisible shield that makes water bead up and dirt release easily. With this preventive mindset, you’ll spend less time scrubbing and more time simply enjoying your clean, welcoming outdoor space.
Successfully cleaning outdoor fabrics boils down to a simple mantra: identify, then act. First, always follow the pre-cleaning protocol—know your fabric and spot test. For mold, use vinegar or oxygen bleach and ensure bone-dry results. For bird droppings, blot with cool, soapy water and avoid rubbing. For general weather grime, a gentle soap-and-water wash followed by a full rinse does the trick. Remember, consistent, gentle care is far more effective than occasional, aggressive scrubbing. Armed with this targeted playbook, you can confidently maintain your outdoor oasis.