That stubborn ink blot on your white kitchen appliance, the mysterious grey scuff on a black car interior panel, the ground-in dirt on a child’s favorite toy—stains on plastic and rubber surfaces are a universal frustration. The immediate impulse is to grab the strongest cleaner and scrub, but that’s often the first step toward permanent damage: a faded color, a cloudy finish, or fine cracks that weren’t there before. The core dilemma isn’t just the stain; it’s the material. A successful plastic and rubber stain removal guide isn’t a single solution, but a decision-making framework. True specialty surface stain cleaning depends entirely on correctly identifying the surface’s finish and understanding its color stability. This guide cuts through the confusion, providing the clear, finish-specific logic you need to clean effectively without the regret of causing harm to expensive, essential, or sentimental items.
The safest way to remove stains from plastic and rubber is to first identify the surface finish—glossy, matte, or textured—and the dye’s colorfastness. Always start with the mildest solution (like dish soap and water) and test any stronger cleaner on a hidden spot to prevent permanent damage like fading, clouding, or cracking. Your cleaning aggression should be dictated by the finish, with glossy surfaces tolerating more options than delicate matte or textured ones.
Your First Decision: Identifying the Surface Finish
Before you grab a cleaner, you need to look at—and feel—the surface. A finish isn’t just about looks; it’s a physical layer with specific porosity and chemical resistance. Choosing the wrong method for the finish is the fastest way to turn a simple stain into permanent damage. This first step is the cornerstone of safe specialty surface stain cleaning. safe specialty surface stain cleaning

The Finish Detective’s Checklist
- Glossy: The surface is shiny, reflective, and smooth to the touch. Think of a new plastic toy, a glossy appliance panel, or a car’s interior trim. This sealed surface generally has higher chemical tolerance.
- Matte: The surface has no shine, appearing flat or satiny. It feels smooth but not slick. Common on modern electronics, some furniture, and tool handles. This finish is more porous and prone to absorbing cleaners, which can cause clouding or shiny spots.
- Textured/Vinyl: The surface has a pattern, grain, or raised bumps. This includes many car dashboards, lawn furniture, and rubber floor mats. The crevices trap dirt and cleaners, making stain removal by finish type critical to avoid residue buildup.
The core rule to remember: Glossy finishes can often handle stronger solutions, while matte and textured finishes demand a gentler, more cautious approach. When in doubt, always treat the surface as if it’s matte.
The Cleaner Matrix: Matching Solutions to Finishes
This matrix is your core reference for specialty surface stain cleaning. It pairs common stains with the safest initial cleaning agents, segmented by the finish you just identified. The logic behind each pairing is key: for example, isopropyl alcohol is a powerful solvent for glossy plastics but can strip the top layer of a matte finish, leaving a permanent shiny patch.
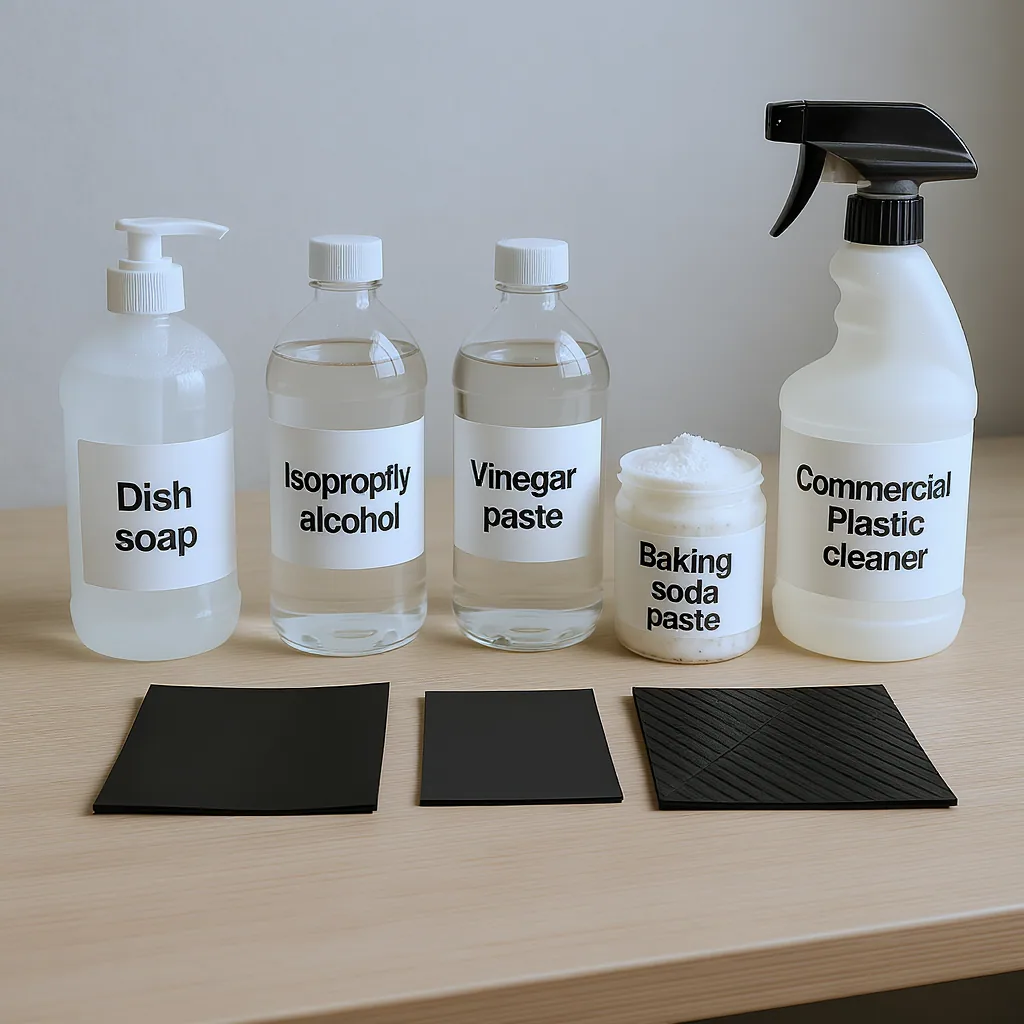
Always start with the mildest option in a cell (like dish soap and water) and move to stronger solutions only if necessary, testing each step in a hidden area first.
| Stain Type | Glossy Plastic/Rubber | Matte Plastic/Rubber | Textured/Vinyl |
|---|---|---|---|
| Ink (Ballpoint, Marker) | Solution: Rubbing alcohol (70% isopropyl) on a cotton swab. Caution: Wipe quickly; don’t let it pool. Test on colored plastics for dye stability. | Solution: Mild dish soap and water with a soft microfiber cloth. For stubborn marks, a tiny dab of toothpaste (non-gel) on a damp cloth. Caution: Avoid alcohol-based hand sanitizers or nail polish remover, as they will damage the finish. | Solution: Dish soap and warm water with a soft-bristle brush (like a toothbrush) to work into texture. Caution: Rinse thoroughly to prevent soap residue from drying in the grooves. |
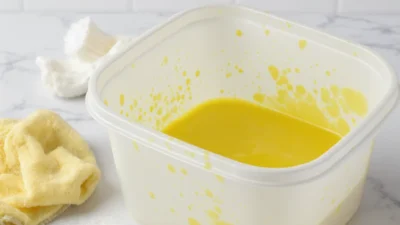
| Dye (Food Coloring, Kool-Aid) | Solution: Paste of baking soda and water, or a commercial plastic cleaner. Caution: Act quickly. For set-in dye, a diluted bleach solution (1:10) only on white or very light-colored glossy surfaces. | Solution: Baking soda paste applied gently with a cloth. Wipe with a vinegar-water solution (1:1) to neutralize. Caution: Never use bleach, as it can cause irreversible yellowing or bleaching on matte finishes. | Solution: Baking soda paste scrubbed gently with a soft brush, followed by a thorough rinse with water. Caution: Ensure the paste is fully rinsed from all textured areas to avoid a white, chalky residue. |
| Grease/Oil (Cooking, Handprints) | Solution: Dish soap (a degreaser) and warm water. For heavy grease, isopropyl alcohol. Caution: Safe for most glossy surfaces, but always do a spot test first. | Solution: Dish soap and water only. Use a microfiber cloth to lift the grease without scrubbing. Caution: Do not use alcohol or all-purpose cleaners, which can break down the matte coating. | Solution: Dish soap, warm water, and a soft brush. For car interior vinyl, use a dedicated vinyl cleaner. Caution: Avoid oily “protectants” that can attract more dirt into the texture. |
| Adhesive Residue (Stickers, Tape) | Solution: Isopropyl alcohol or a commercial adhesive remover like Goo Gone. Caution: Apply to the residue, not the plastic, and wipe clean immediately. | Solution: Warm, soapy water and patience. Gently roll the residue off with your finger. Use a tiny bit of olive or coconut oil on a cloth as a last resort. Caution: Harsh solvents will melt the finish. Never use acetone. | Solution: Warm, soapy water and a soft brush. For stubborn glue, a dab of cooking oil on a cloth can help break it down. Caution: Solvents can become trapped in the texture, causing long-term damage or stickiness. |
| Mystery Discoloration/General Grime | Solution: All-purpose cleaner diluted per instructions, or a 1:1 vinegar-water solution. Caution: Even on glossy surfaces, avoid abrasive scrubbing pads that can create fine scratches. | Solution: Diluted vinegar-water or a cleaner specifically labeled safe for matte finishes. Caution: This is where a polymer stain guide emphasizes testing most: what works on one matte surface may harm another. | Solution: Vinegar-water solution in a spray bottle, followed by agitating with a brush and wiping dry. Caution: Ensure the area is well-ventilated and you dry it completely to prevent moisture from lingering in crevices. |
The Color Conundrum: Protecting Dyes and Pigments
Once you’ve matched a cleaner to the finish, the second branch of your decision tree is color. The dye or pigment in plastic and rubber can be surprisingly fragile. Safe cleaning for colored plastics means understanding how different agents interact with colorants.
Dos and Don’ts by Color Family
For White & Light-Colored Plastics:
DO use baking soda pastes and diluted vinegar solutions to combat yellowing and stains. DO consider a very diluted bleach solution only for severe stains on glossy, non-porous white plastic. DON’T use bleach on matte or textured white surfaces, as it can cause patchy bleaching and accelerate yellowing. Avoid leaving white plastic in direct sunlight after cleaning, as UV exposure is a primary cause of yellowing.
For Bright & Dark-Colored Plastics:
DO test any cleaner, especially solvents like alcohol, on a hidden area first to check for color fading or transfer. DO stick to pH-neutral cleaners like dish soap for routine cleaning. DON’T use bleach or ammonia-based cleaners, as they can strip or fade vibrant dyes. For dark plastics, some commercial “back-to-black” products can restore faded color, but test them first.
For Transparent & Translucent Plastics:
DO use the gentlest methods possible—often just soapy water and a ultra-soft cloth. Clouding is a major risk. DO dry immediately with a microfiber cloth to prevent water spots. DON’T use abrasive pastes or scrubbers, which will microscratch the surface and destroy clarity. Avoid alcohol on acrylic, as it can cause cracking.
Imagine cleaning a child’s bright red, matte-finished toy car that has dried blue marker on it. The instinct might be to use alcohol, but that could strip the matte finish and fade the red dye. Instead, following the matrix, you’d start with dish soap and water, gently lifting the stain without compromising the toy’s color or feel. This practical approach preserves the item.
Common Pitfalls & How to Avoid Them
Even with the best intentions, it’s easy to make a damaging error. Here are specific mistakes to sidestep in your plastic and rubber stain removal efforts.
- Using Abrasive Pads on Any Finish: Steel wool, rough scouring pads, and even the popular “magic eraser” (which is a fine abrasive) will scratch glossy plastic and permanently alter matte or textured finishes, creating shiny, smooth spots. Fix: Use only soft microfiber cloths, sponges, or soft-bristle brushes.
- Applying Harsh Solvents Indiscriminately: Acetone (nail polish remover) will melt many plastics, like ABS (common in LEGO, appliance housings). Rubbing alcohol can degrade rubber and certain coatings. Fix: Confirm the material if possible, and always start with the mildest solvent (soapy water) first.
- Letting Cleaners Sit or Soak: Unlike cleaning a countertop, letting a cleaner dwell on plastic or rubber can allow it to penetrate and cause swelling, clouding, or dye migration. Fix: Apply, gently agitate, and wipe clean immediately.
- Using Heat Guns or Hair Dryers: Applying direct heat to remove a sticker or soften a stain can warp plastic and cause rubber to become brittle and crack. Fix: Use gentle methods like warm, soapy water or a approved adhesive remover at room temperature.
- Mixing Cleaning Chemicals: Combining cleaners (e.g., bleach and vinegar) creates toxic gases and can also create a solution that aggressively attacks the polymer surface. Fix: Use one cleaner at a time, and rinse thoroughly with water before switching.
- Neglecting to Rinse Textured Surfaces: Soap or cleaner residue left in the grooves of textured rubber or vinyl will attract more dirt and can become sticky. Fix: After cleaning, go over the area with a water-dampened cloth or brush, then dry thoroughly.
When to Stop: Signs of Damage and Last Resorts
Sometimes, a stain won’t budge, or a cleaning attempt goes wrong. Recognizing the signs of damage is a critical part of the decision-tree process—sometimes the safest choice is to stop and reassess.
Diagnosing Damage
- Clouding/Hazing: The surface looks milky or foggy. This often means the cleaner has etched or penetrated the top layer. On transparent plastics, this is usually permanent.
- Cracking or Crazing: Fine lines appear on the surface. This indicates the plastic has become brittle, often from solvent exposure or UV degradation, and the structural integrity is compromised.
- Stickiness or Tackiness: The surface remains sticky after cleaning. This can happen when a plasticizer (the chemical that keeps plastic flexible) leaches out, often accelerated by the wrong cleaner. It’s common in older vinyl and rubber.
- Permanent Discoloration: The stain is gone, but the color is now faded, blotchy, or changed. The dye has been altered or removed.
If you encounter any of these, cease cleaning immediately. Further action will likely make it worse.
Last-Resort Options & Realistic Expectations
For a valuable or sentimental item with a stubborn stain that hasn’t yet been damaged, you might consider a last resort. For glossy hard plastics, a very fine polishing compound (like those for car headlights) followed by a plastic sealant might reduce the appearance of mild clouding or surface stains—but it will remove a microscopic layer of material. For discolored white plastic, specialized “retrobright” processes using hydrogen peroxide and UV light are used by enthusiasts, but they require careful control and carry risk.
Manage your expectations: not all stains can be removed without risk. If an item is inexpensive or the damage is significant, replacement may be the most pragmatic and stress-free choice. The goal of this stain removal by finish type guide is to empower you to make informed choices that preserve your belongings, knowing when to press on and when to let go is part of that skill.
Cleaning with Confidence, Not Chemicals
Successfully tackling stains on plastic and rubber isn’t about finding the strongest chemical in your cupboard. It’s about making informed choices based on a simple, two-part framework: first identify the finish, then respect the color. This methodical approach turns a potentially damaging guesswork chore into a confident preservation task.
By starting with the gentlest solution, testing religiously in a hidden spot, and using the cleaner matrix as your guide, you protect the items you use every day. Remember, the goal is to remove the stain, not the surface. Armed with this decision-making mindset, you can extend the life of everything from children’s toys to car interiors, keeping them looking their best without unintended consequences.
This guide provides a safe framework for removing stains from plastic, rubber, and vinyl. The core principle is that the correct method depends on the material’s finish and color, not just the stain itself.
- Identify the Finish First: Determine if the surface is glossy (shiny, tolerant), matte (flat, delicate), or textured (bumpy, residue-prone). Your cleaning aggression level depends on this.
- Consult the Cleaner Matrix: Match the stain type (ink, grease, dye, etc.) to your surface finish using the provided table. Always start with the mildest recommended solution.
- Protect the Color: Test any cleaner on a hidden area to check for dye fading. Avoid bleach on colored and matte surfaces, and be extra gentle with transparent plastics.
- The Golden Rule: Test First: There is no universal cleaner. An inconspicuous spot test is your single most important step to prevent permanent damage.